How to make a lockable bra
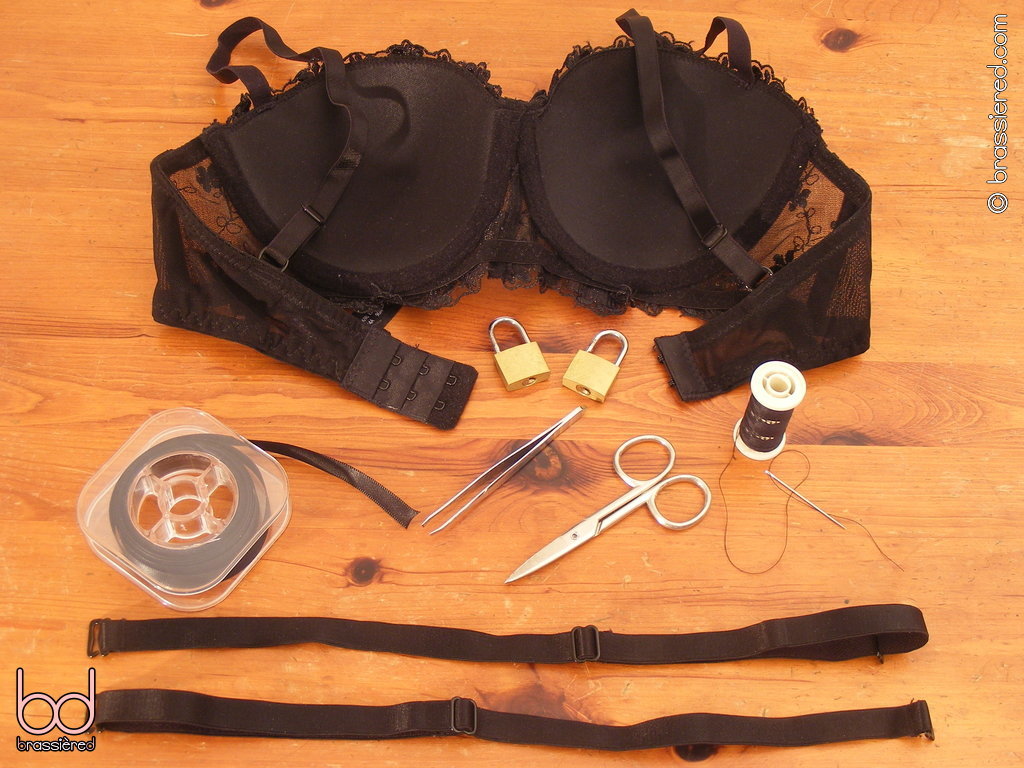
Before setting to work, it's worth taking a moment to understand how bra clasps are constructed. Regardless of the size or style of the garment they fasten, the hooks and eyes are invariably sewn in a very similar way, no matter whether there are two or ten of them. Indeed, a cursory inspection of most bras shows that their fasteners were probably once separate parts that have simply been sewn onto the ends of the bands, with the same mass-produced components available to be bought ready-made from companies who sell bra-making supplies.
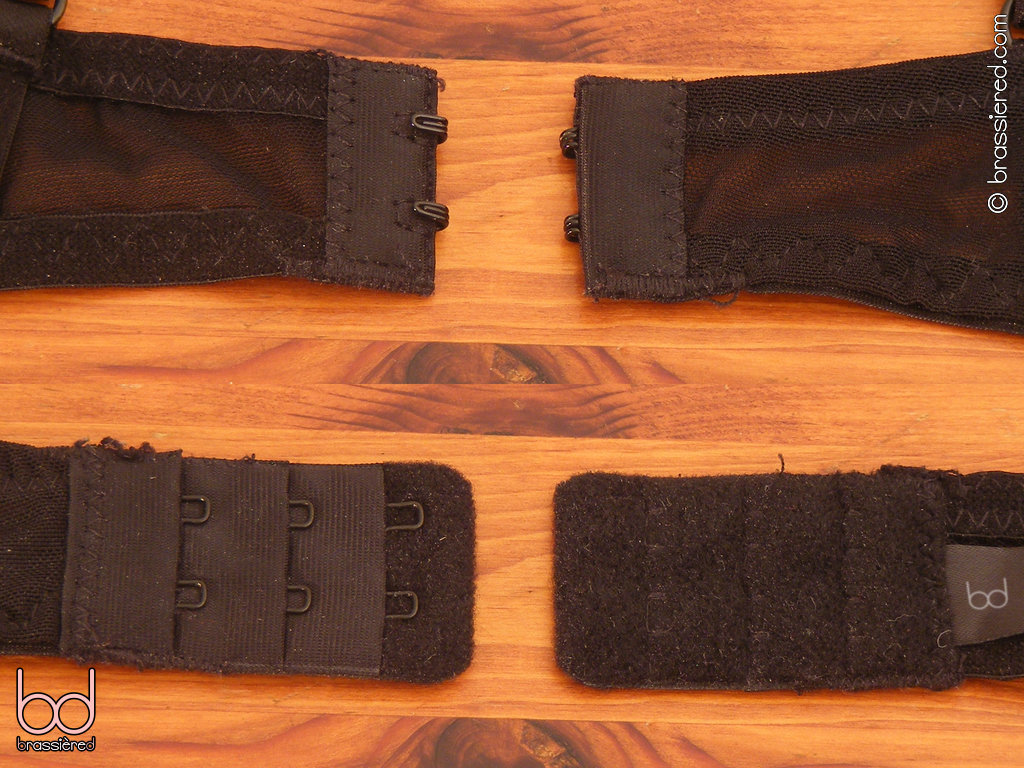
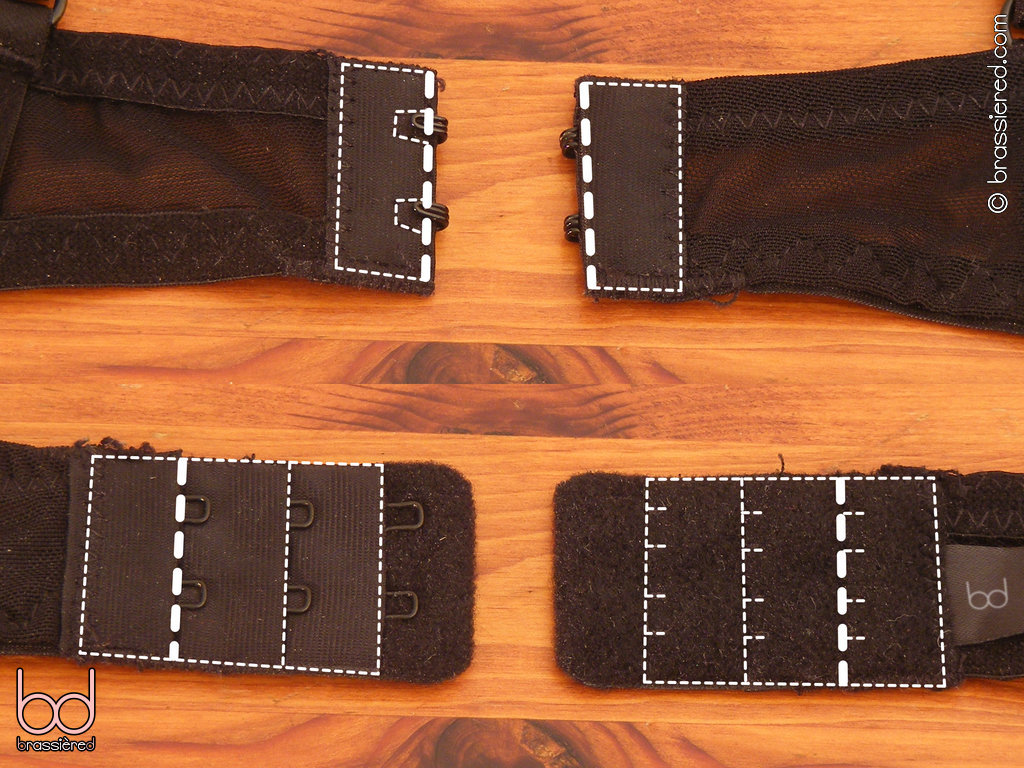
It is therefore very likely that the bra you have chosen has a clasp that is fundamentally the same as that shown in Figure 2, even though the number of fastenings may be different. Making it lockable is simply a case of unpicking part of the highlighted stitching on each side, inserting loops of ribbon into the resulting openings, then sewing them back up again. Because the individual hooks and eyes are attached by means of separate stitching, doing so runs no danger of affecting how the bra fastens - rather, it makes it even more secure!
Begin by opening up a gap between the two hooks. If the bra you have chosen has more, you should consider where you want the lock to sit - for a bra with three hooks, it makes sense for the loop to be sewn between the top two, allowing the body of the padlock to rest against the clasp rather than the wearer's back. For a locking longline bra, you may wish to add a second loop towards the bottom of the garment, if not another one in the middle as well, with the extra locks serving to strengthening security both physically and psychologically.
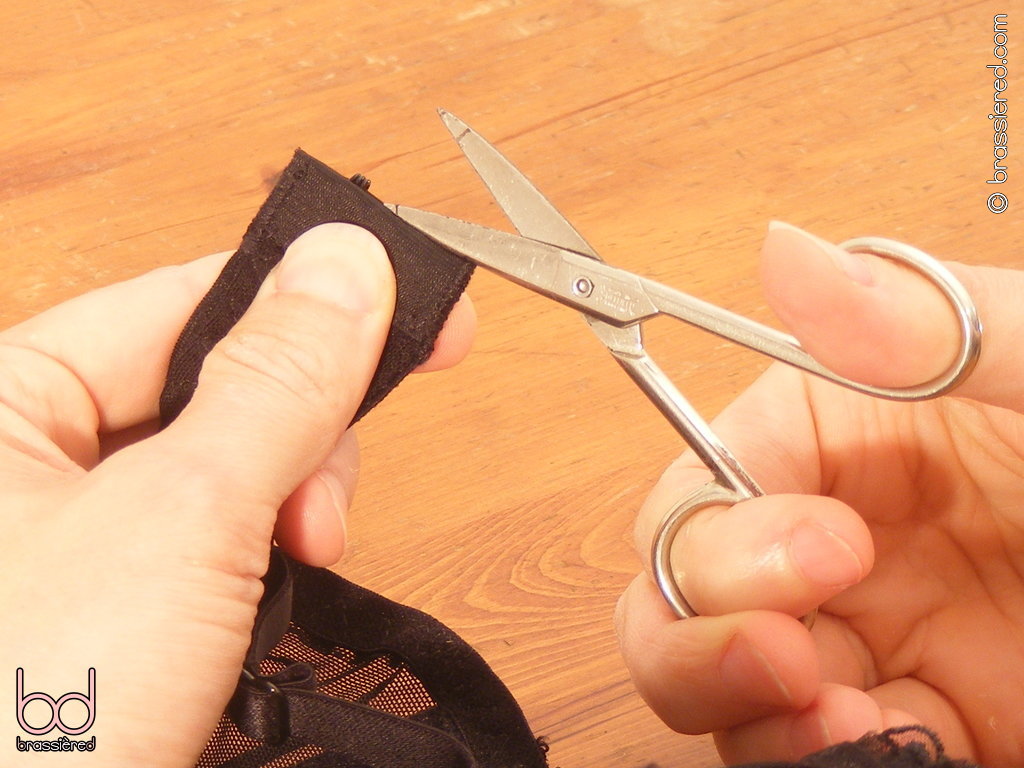
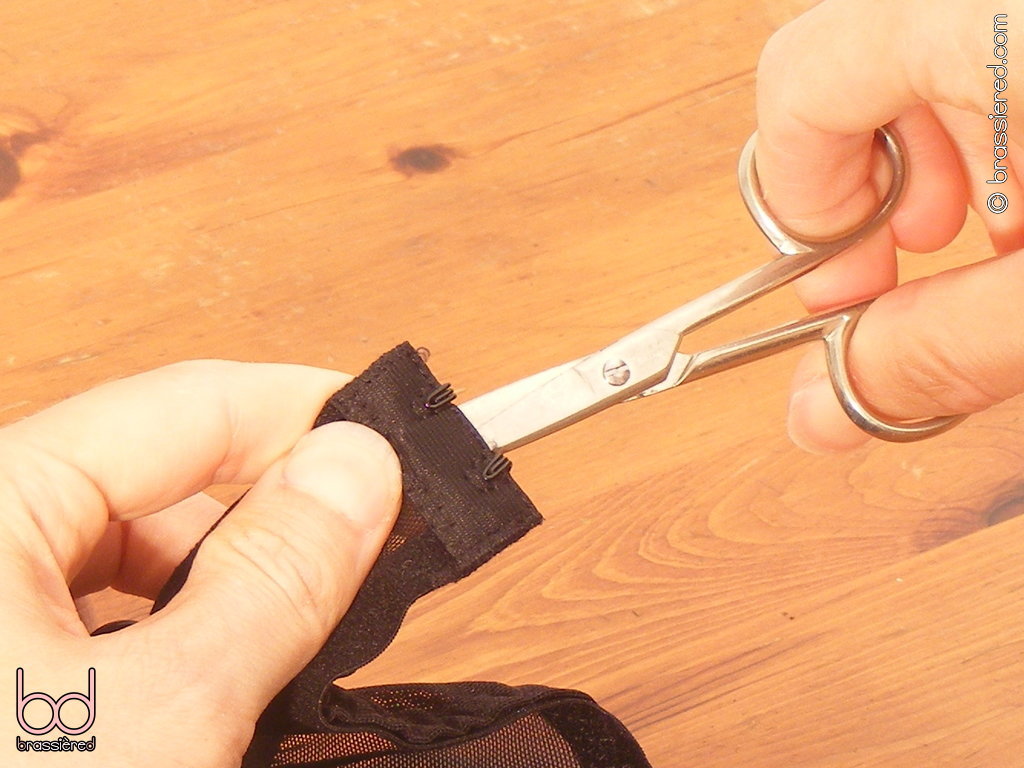
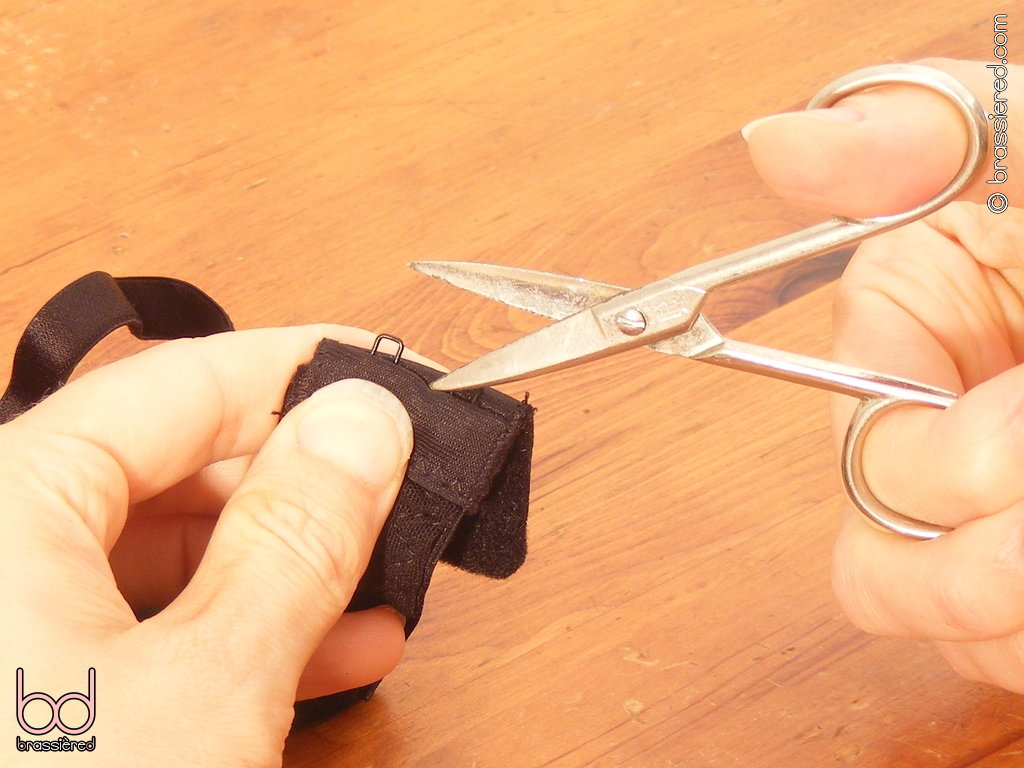
Carefully unpick the stitching between the two hooks, using a blade of the scissors as shown in Figure 3 to stretch and then break the thread without cutting the surrounding fabric. After repeating this process a few times, it is possible to open the scissors inside the clasp, using the back of their blades to widen the gap as demonstrated in Figure 4. It shouldn't take long before the opening is as large as it can be without affecting how the hooks are attached, with the latter's stitching now all that stops further enlargement.
Considering where the lock should sit again, take the ribbon and determine how long the loop needs to be, allowing extra length for its ends to be folded back upon themselves (Figure 5). The part of the loop that will be contained within the clasp should consist of four thicknesses of ribbon, not only to keep its ends from fraying, but also to prevent it being pulled out. Once you have these folded, grasp the loop with the tweezers and proceed to push it into the bra as shown in Figure 6, taking care to ensure that it sits flat inside the clasp.
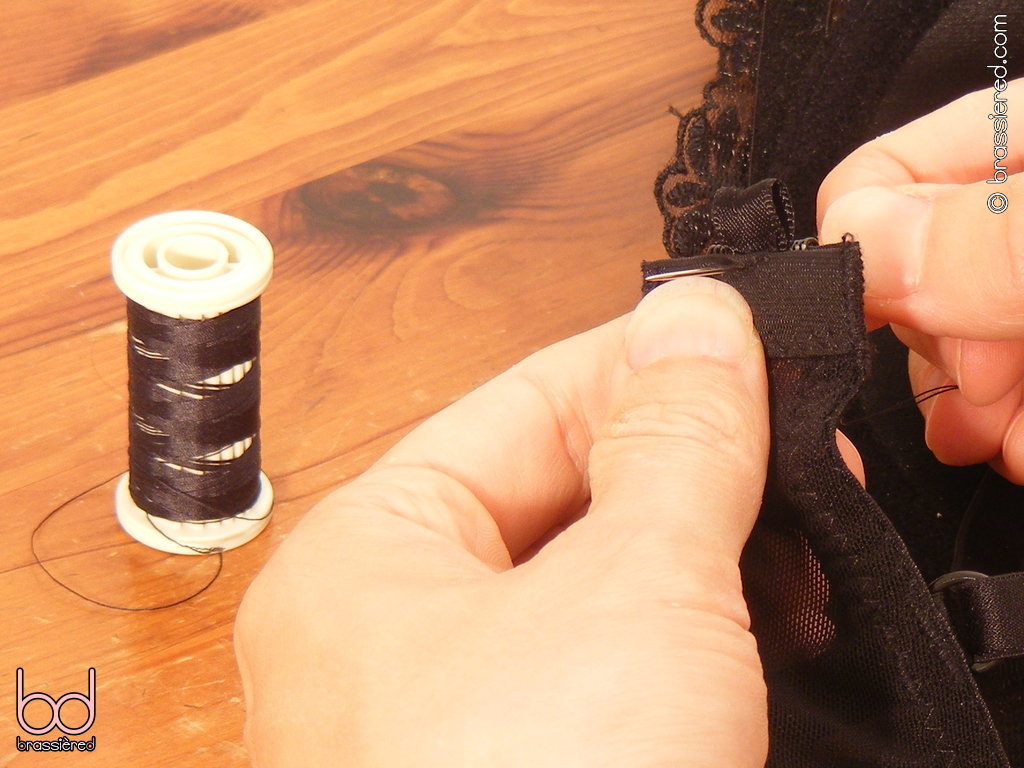
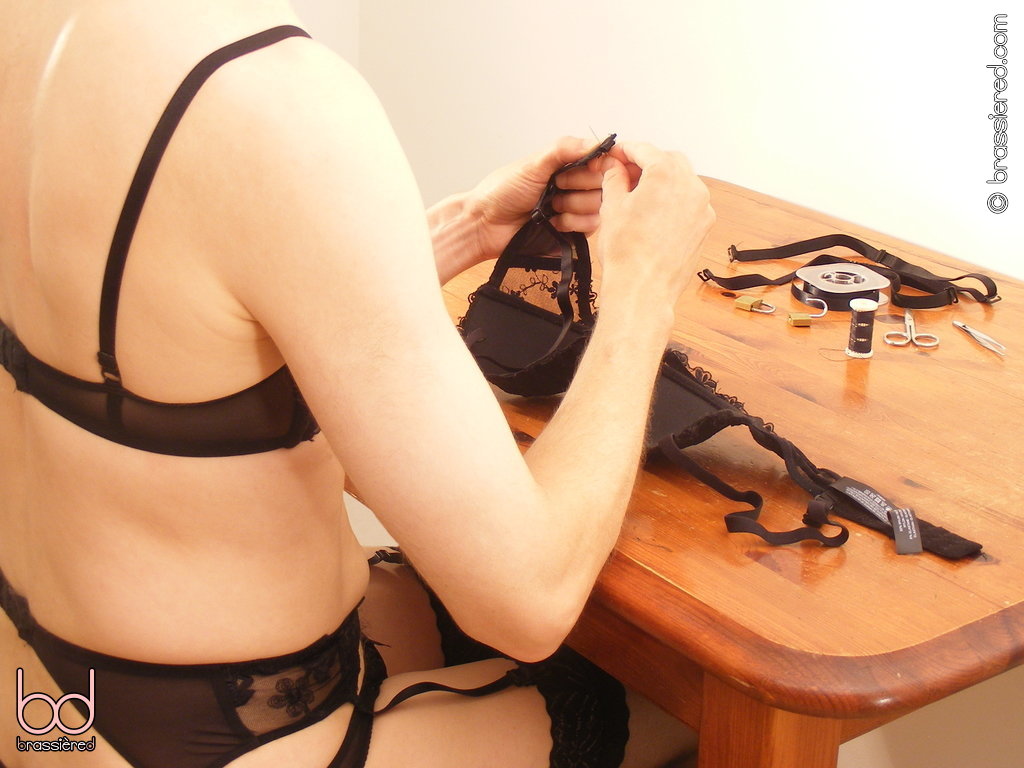
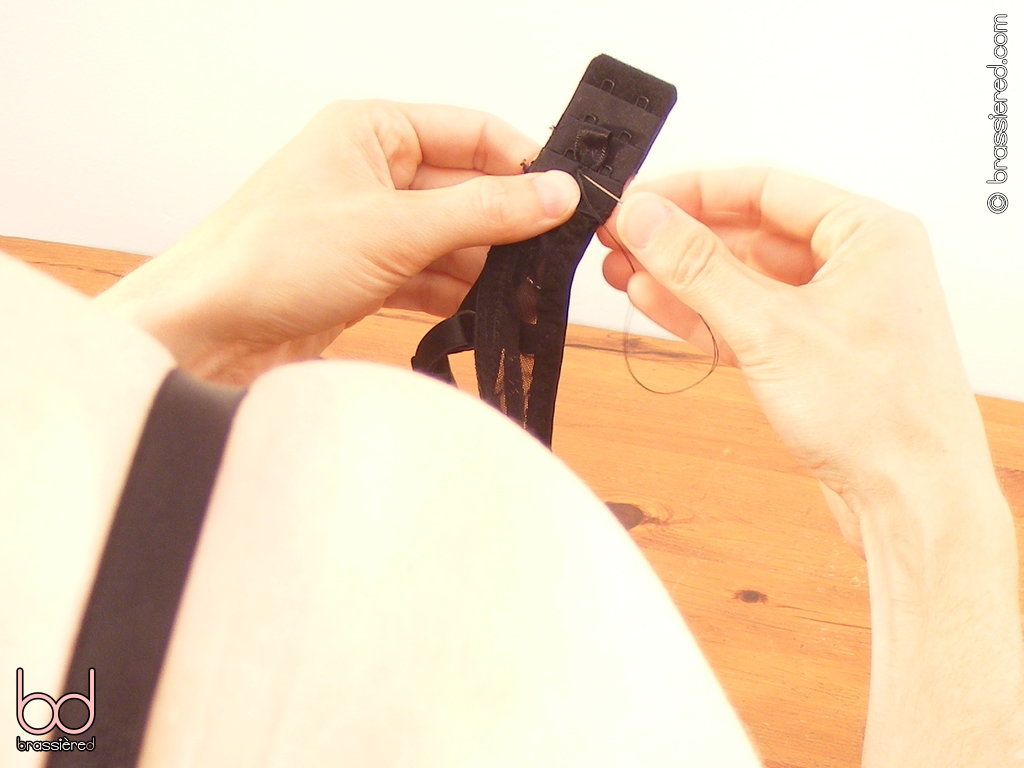
It's now straightforward to sew the loop in place, putting back the stitching that was unpicked earlier (Figure 7a). If your husband is a novice with needle and thread, he may find doing so more difficult than he might have thought - it's amazing how swiftly a man can be cut down to size simply by asking him to thread a needle, let alone if he's expected to sew his own bra wearing nothing but sexy lingerie. As Figure 7b shows, doing so can serve as a punishment in its own right - quite apart from the purpose such womanly work will be put to!
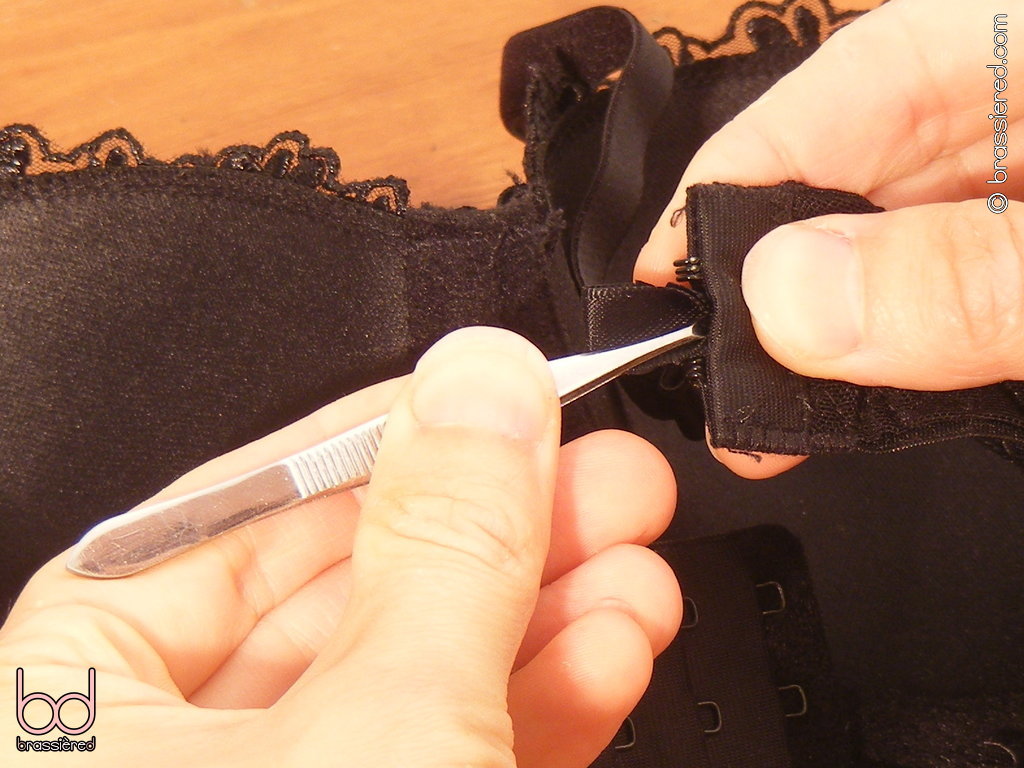
Having added a loop between the hooks, it's now time to do the same on the other side. The procedure here is very similar to before, involving unpicking part of the stitching - this time, between two of the eyes. Most bras have a number of sets, but we'll be using the innermost one, using the scissors to extract the thread hidden in the folded material before going on to open up another gap (Figure 8).
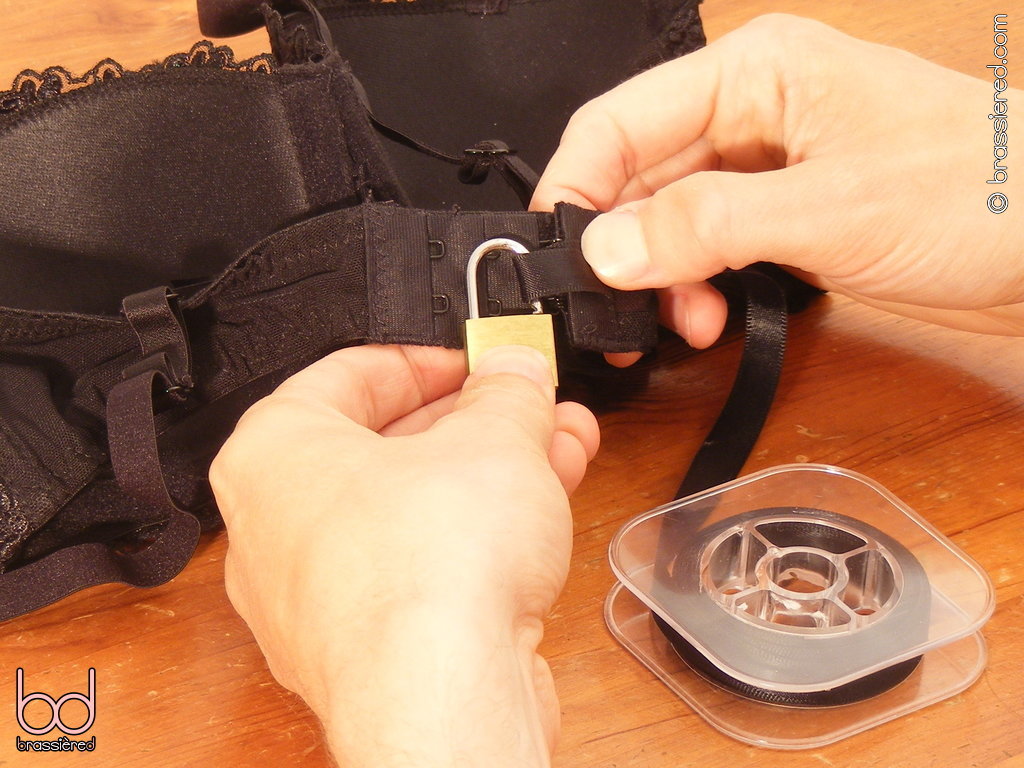
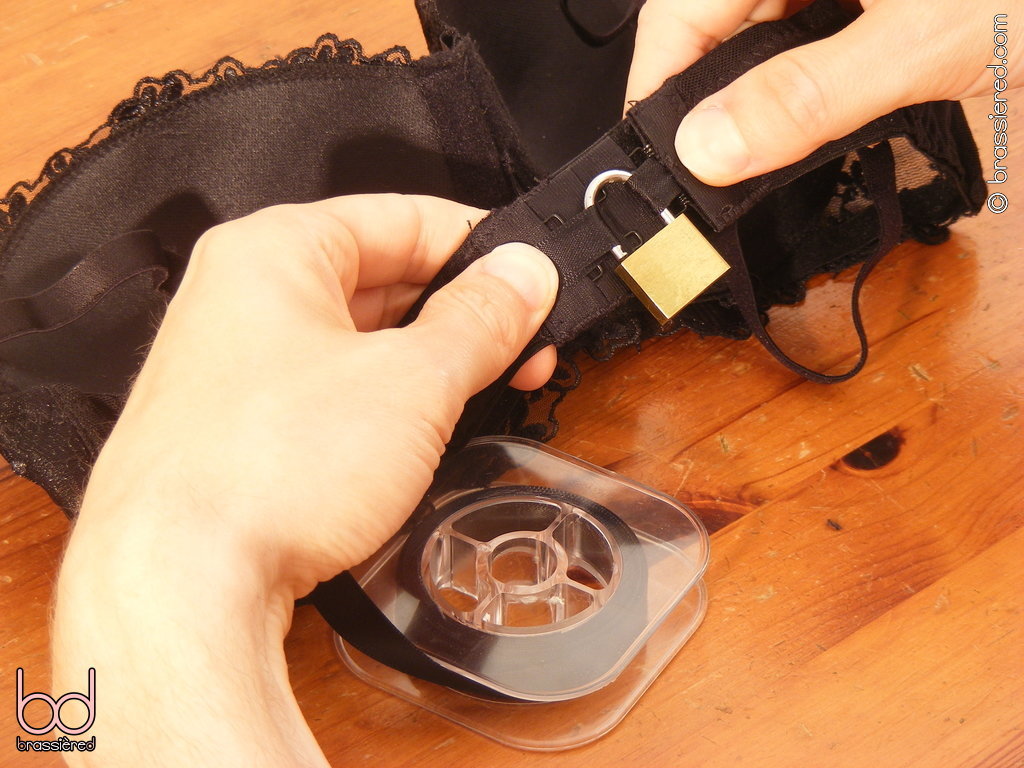
From here, the next stage is to consider where the lock should sit a second time, once again creating a loop of ribbon long enough for its folded ends to be contained within the clasp (Figure 9). After inserting it into the end of the bra with the tweezers (Figure 10), it's worth double checking the position of the padlock as shown in Figure 11, making sure that the two loops of ribbon are short enough to hold it snugly in place while still allowing the bra to be firmly fastened. Ideally, unhooking the clasp should make the band no looser, sending an unmistakable message to a man who might try and escape its embrace.
When you are sure the second loop is in the right position, stitch up the opening in the clasp (Figure 12a). If you are having your husband do this for you, as I do in Figure 12b, be sure to check his work - not only pulling on the loops yourself to make sure that their stitching is secure, but threading the padlock through them and then presenting the locked bra to your budding seamstress so that he can do the same. A man who has failed to defeat such a fastening when he has it in front of him will be far less likely to try and beat his bra when its clasp is locked behind his back, no matter how embarrassing having to wear it may be!
If the bra you are wanting your husband to wear is sufficiently tight, you can simply slip its straps up his arms at this stage, fastening its clasp in the usual fashion before threading the padlock through the loops. Whether you choose to click the lock closed yourself, or instead have your husband condemn himself to the cups with his own hand, the end result is the same - a bra that can't be unhooked, but must be pulled down over the hips if he's to have any hope of getting out of its grasp without you finding out. That's easier said than done, as you'll discover if you try yourself sometime, but to prevent any possibility of your husband slipping out, all it takes is a collar and tether.
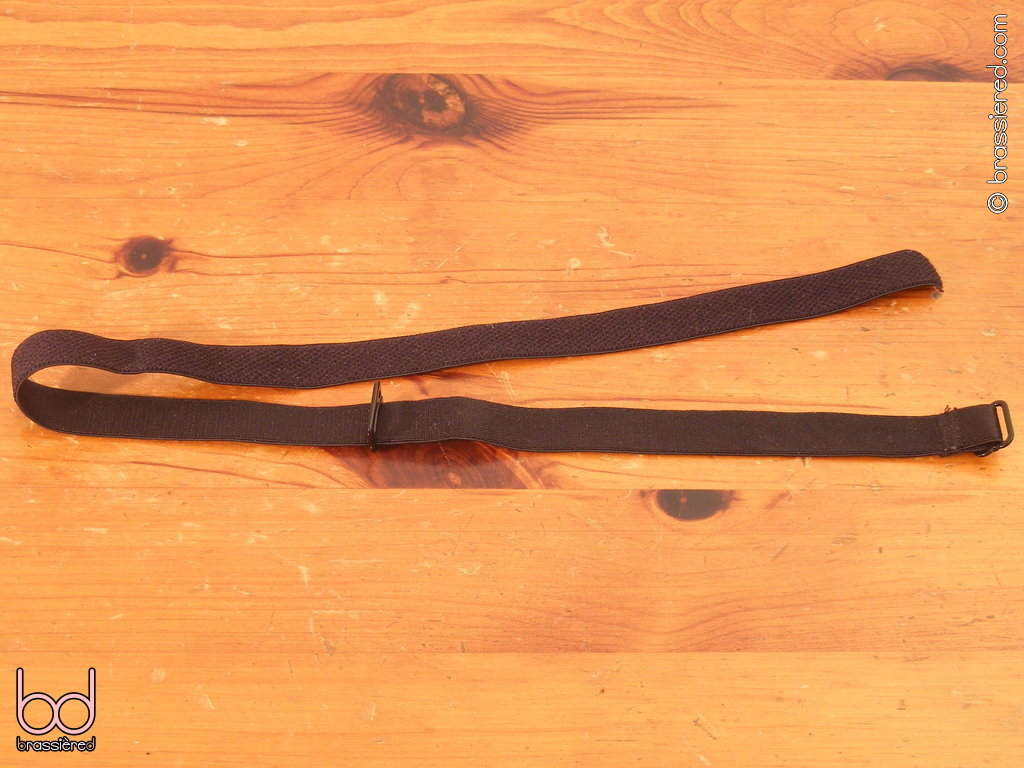
If you've followed the earlier suggestion of using a pair of detachable bra straps, you'll have two lengths of lingerie elastic, each of which has two hooks in the shape of a nine and a buckle in the shape of an eight - the former to allow the straps to be attached to the cups and back of a bra, the latter to allow their length to be adjusted. Figure 13 shows how the elastic is looped through the buckle twice to achieve this, as well as illustrating how one of the hooks is sewn onto the end of the strap whereas the other is free to slide.
Cut off the end hook and work the elastic back through the buckle until you are able to remove the second one as well (Figure 14). Having done so, rethread the strap, taking care to ensure that its shiny side is facing outwards - you may wish to refer back to Figure 13 for this, or use the other strap as a guide.
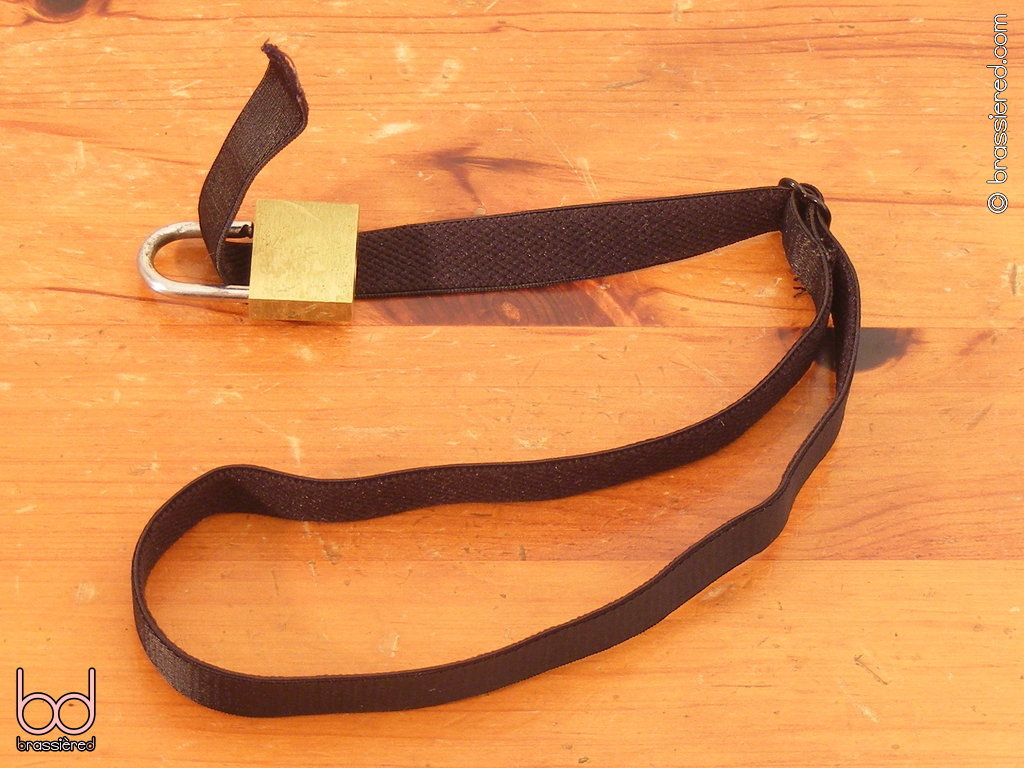
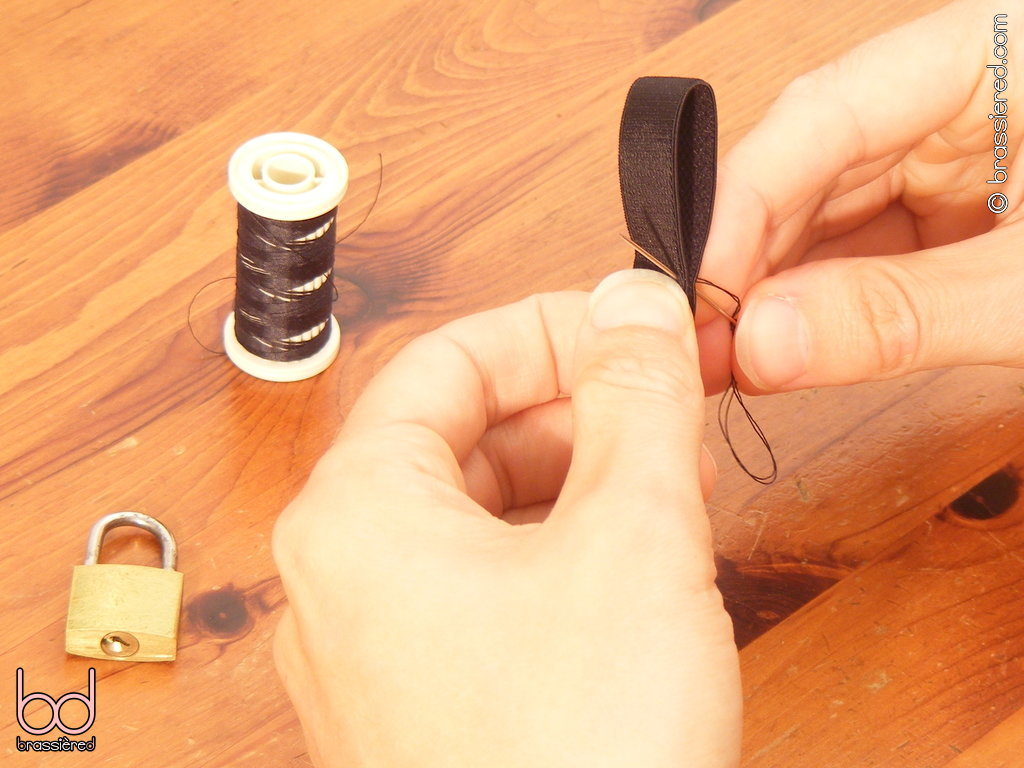
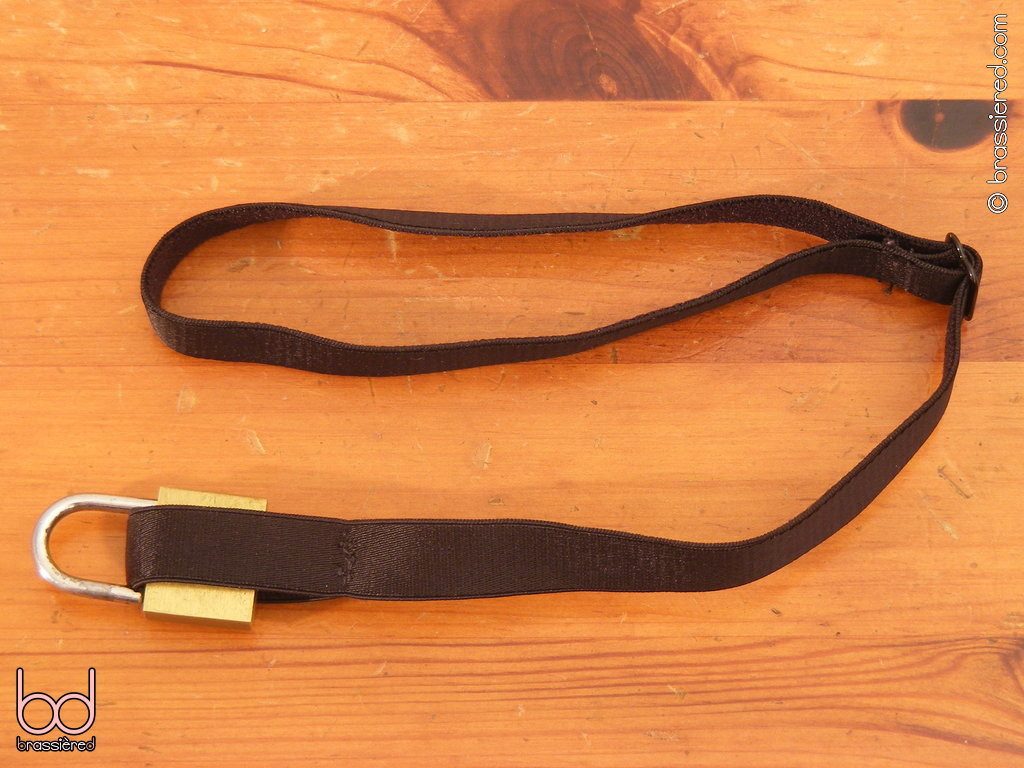
Next, fold the free end of the elastic over far enough that it can comfortably surround the body of the lock (Figure 15) before sewing it into a loop (Figure 16). The finished result in shown in Figure 17, which demonstrates how the loop can be used to lock the strap in place. Again, be sure to test the strength of the stitching, having your husband stretch the elastic as though struggling against his bra. No matter how much he pulls, his efforts should prove futile.
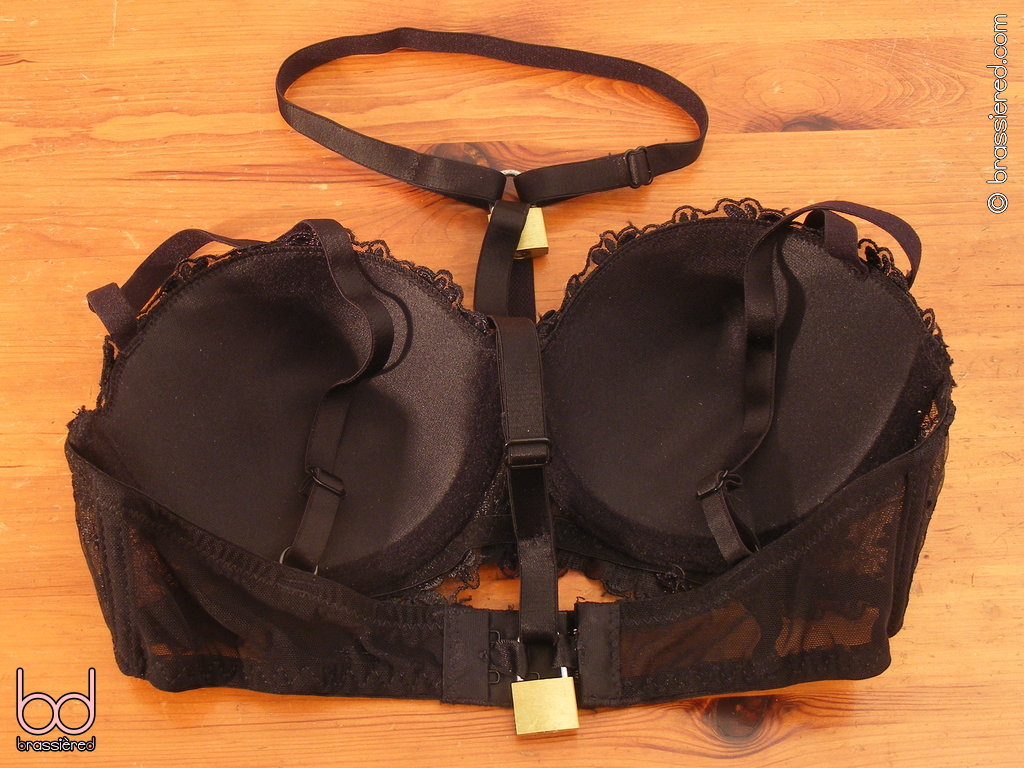
Having made the same modifications to the second detachable strap, we're finally in a position to put everything together. Figure 18 shows how the lock that will secure the band of the bra can also be attached to the bottom of the tether, which in turn can then be wrapped around the body of the other padlock. The shackle of the latter can then be used to fasten the two ends of the strap that will serve as the wearer's collar, with the extra elastic wrapping around his neck to ensure that he stays in his bra like a submissive husband should.
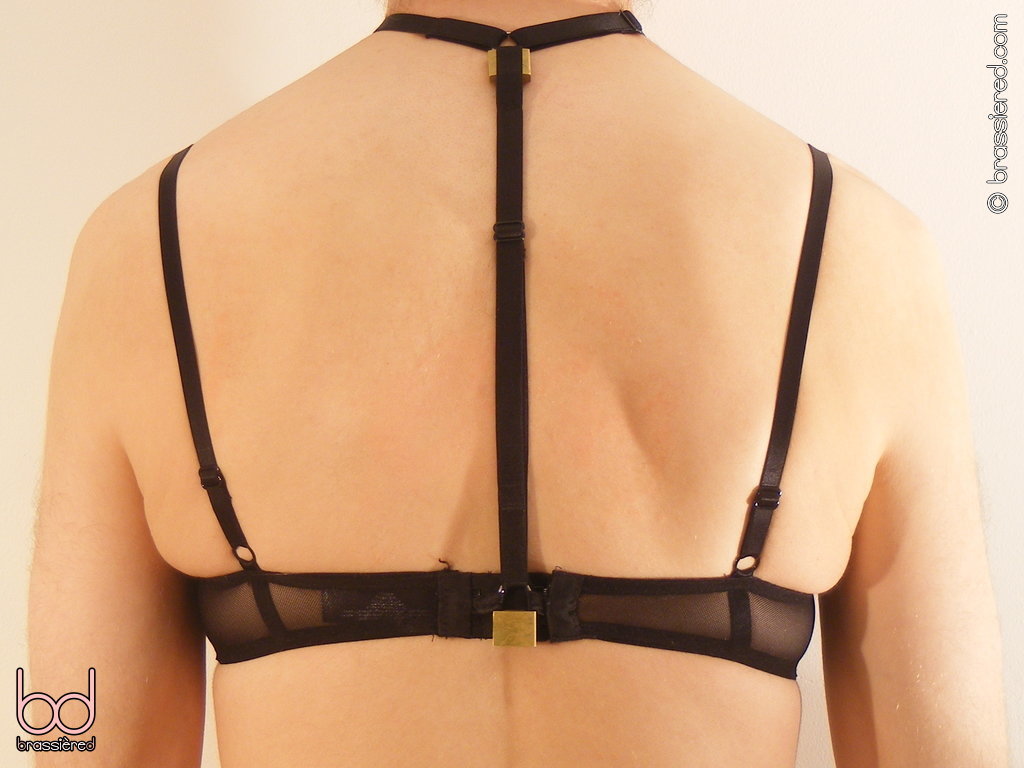
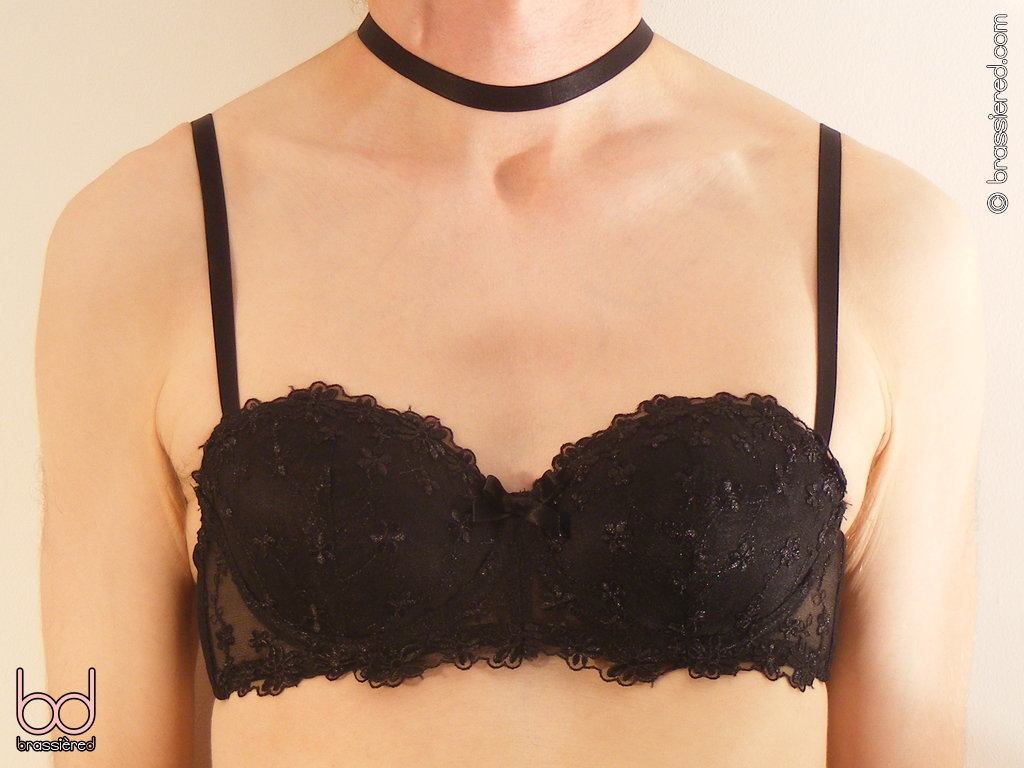
Of course, there's no better way to demonstrate how this all works than to have my husband model it for you. In Figure 19, you can see him trapped in the straps of the tight black bra that he spent the evening sewing, with the floral cups that press against his chest now impossible for him to slip out of thanks to the fruits of his labours. The only additional modification that is necessary at this point is to adjust the extra straps, sewing their buckles closed so that he won't be tempted to slacken them. Instead, my brassièred husband will have to suffer a slight tension around his throat, along with the ambiguous breasts that the curving moulded cups give him, both acting as a constant reminder of his submission to me - and the bra that I make him wear!
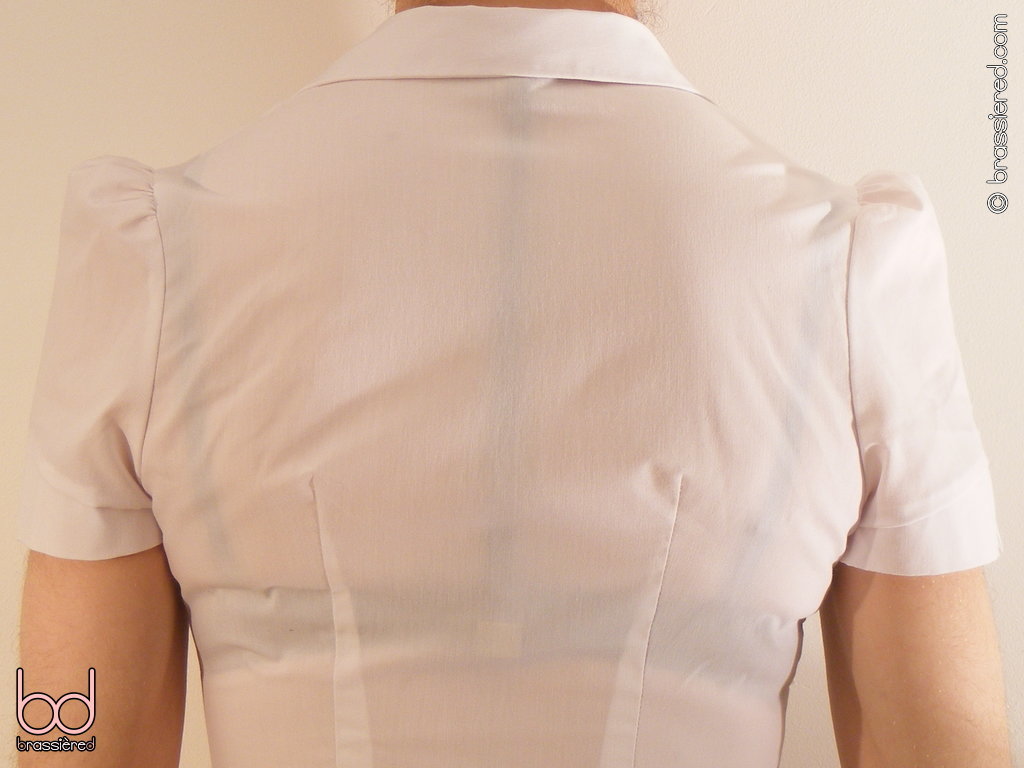
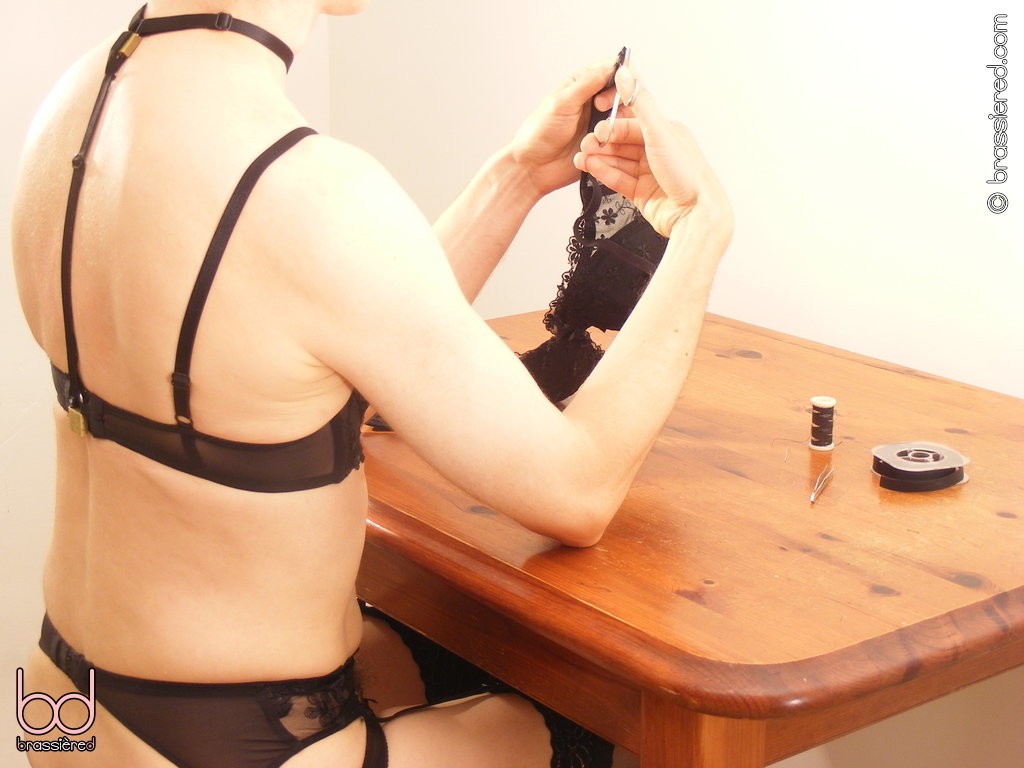
Beneath a thin white blouse, the shameful shadow of the three straps are all too apparent, as Figure 20 shows. If your husband will be wearing such a bra in public, he'll need to take care not to allow it to show, but a layer or two of loose, dark clothing is sufficient to keep everything safely camouflaged. A traditional collar and tie is quite enough to hide the bra strap collar, providing the perfect encouragement for your husband to look smart. Of course, there's no reason why he should cover up around the house if you want to confront him with what he's having to wear. After all, a locking bra is the perfect lingerie for a spot of sewing, with a man who has sewn one having no excuse for not making another - as you can see my husband doing in Figure 21.
In due course, a man can be trained to wear a bra just like a woman would, eventually not even thinking of taking it off until it's time to undress. Even so, a lockable bra works a treat for punishment purposes, quite apart from proving a useful tool to help your husband develop such discipline. Whether you surprise him with one that you've sewn yourself, or have him follow these instructions as part of his punishment, you can be sure that he'll keep his bra on until you choose to unlock it, deepening his submission to you in the process.