Measurements to take
Shoulder to shoulder
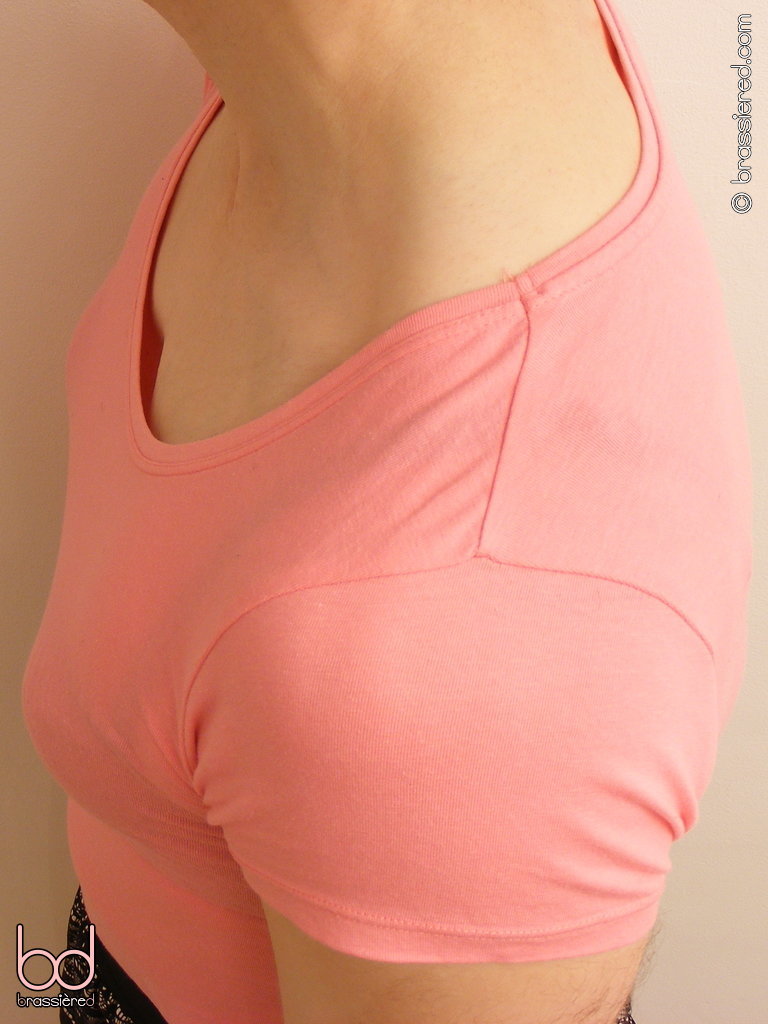
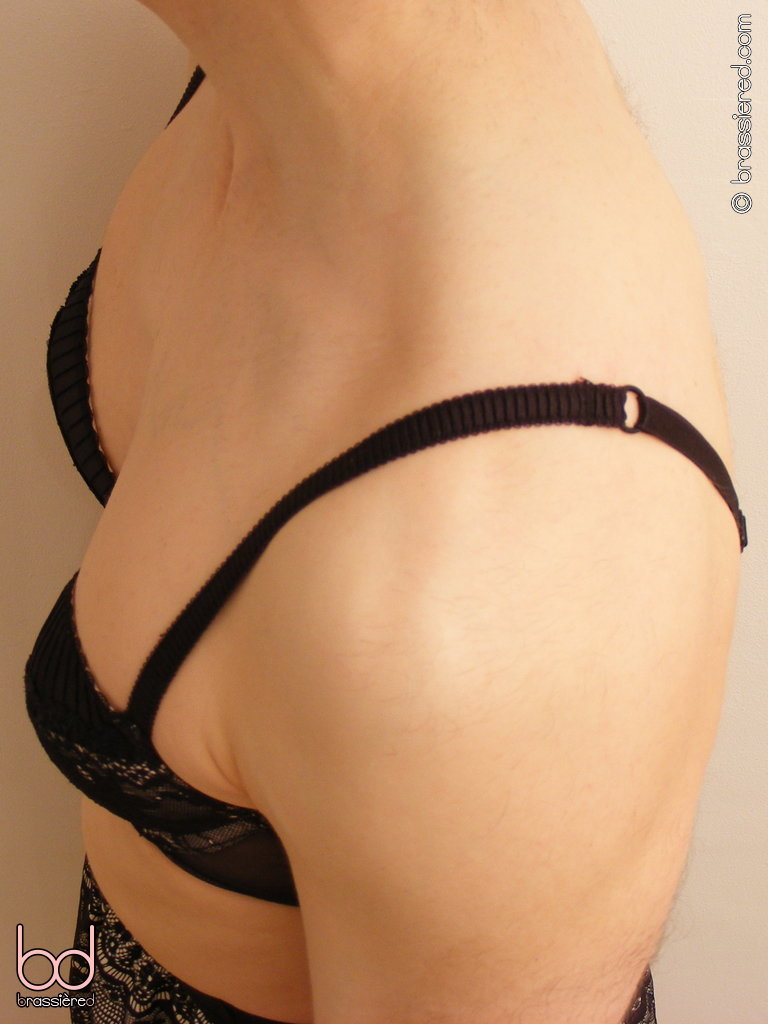
Running your fingers over your shoulder, you should feel a bony knob at its very end, just before the arm begins to fall away. This is the shoulder tip, which, as Figure 2.2 shows, coincides neatly with the convergence of seams on a suitably snug stretchy top. Situated on the ridge of the shoulder, it's the furthest point that can support anything without it slipping, such that your bra strap should be sitting somewhat nearer your neck.
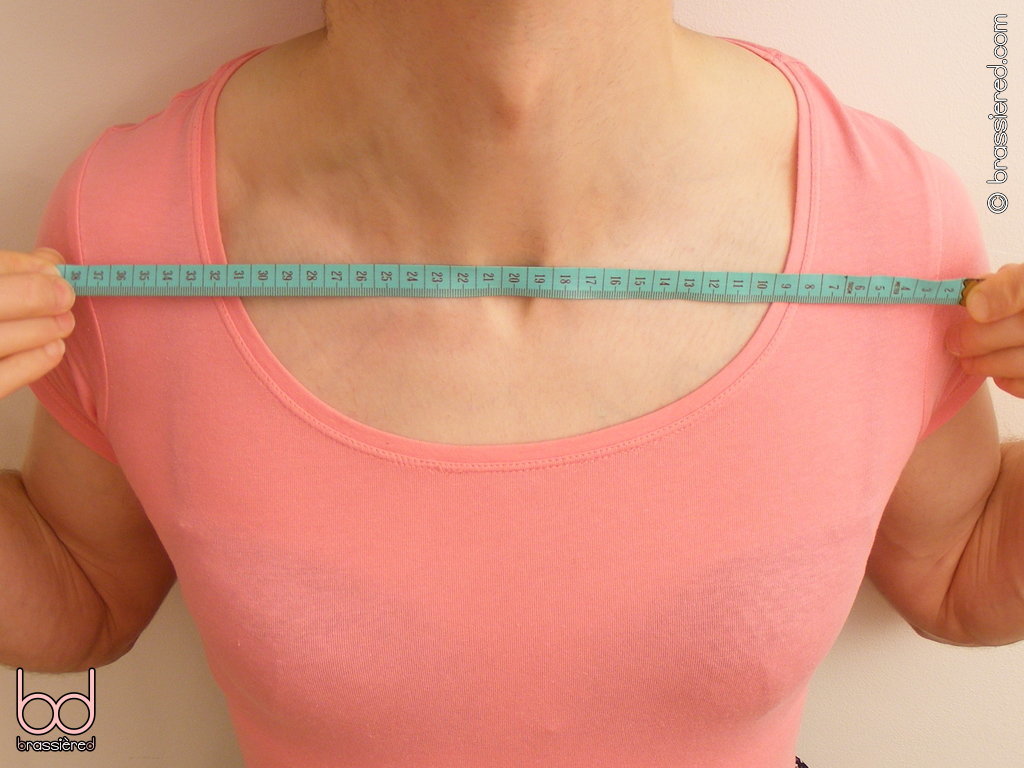
The first measurement we'll be taking is the shoulder to shoulder width, which is the horizontal distance between this point and the corresponding one on the other side. Take care not to allow the tape measure to curve with your body, but instead hold it straight as my husband does in Figure 2.3 - something that may require you to come down a couple of inches in order to avoid your neck.
Bust circumference, front bust and back bust
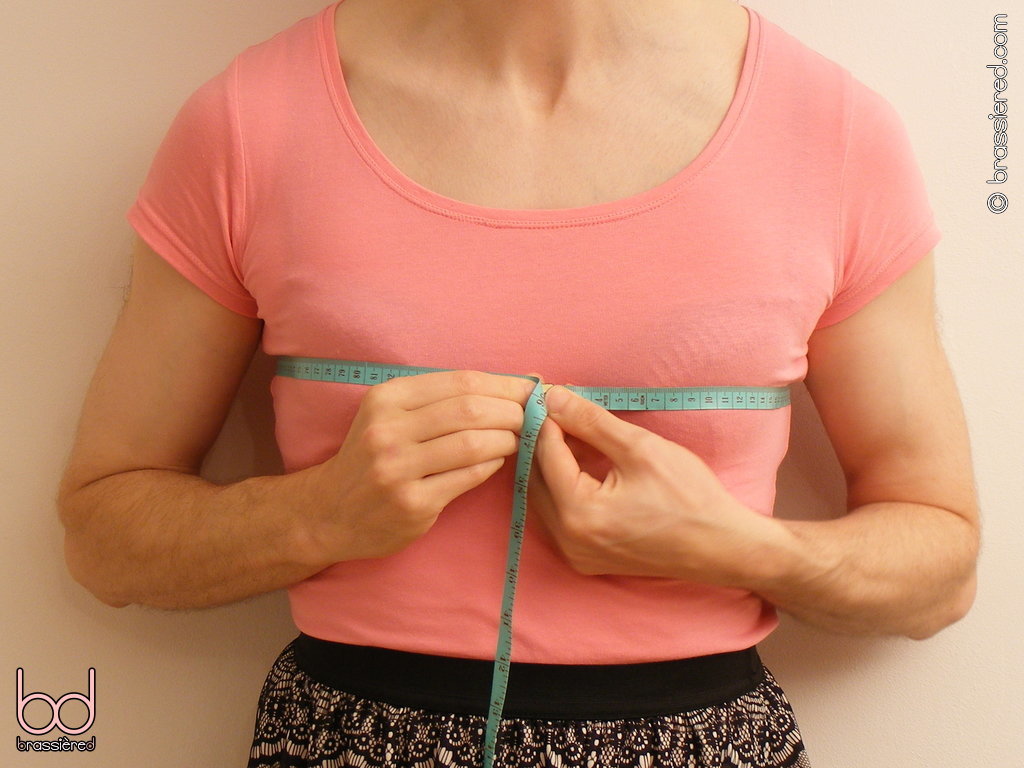
To discover your bust circumference, wrap the tape measure around the fullest part of your chest as my husband does in Figure 2.4, taking care not to pull it so tight as to distort the shape of your breasts. Keep your body relaxed, and make sure that the tape measure doesn't slip down behind your back, but instead stays parallel to the ground all the way around your torso. Incidentally, if the band of your bra rides up rather than following a similar line, then you're wearing the wrong size - try a sister size with a narrower band but larger cup.
If you've ever been fitted for a bra, you'll recognise this as the overbust measurement - the first of two numbers necessary to determine your bra size, the other being the underbust measurement, taken directly under your breasts. The latter won't be needed for our purposes - indeed, we won't be using the full bust circumference directly, but rather dividing into front and back.
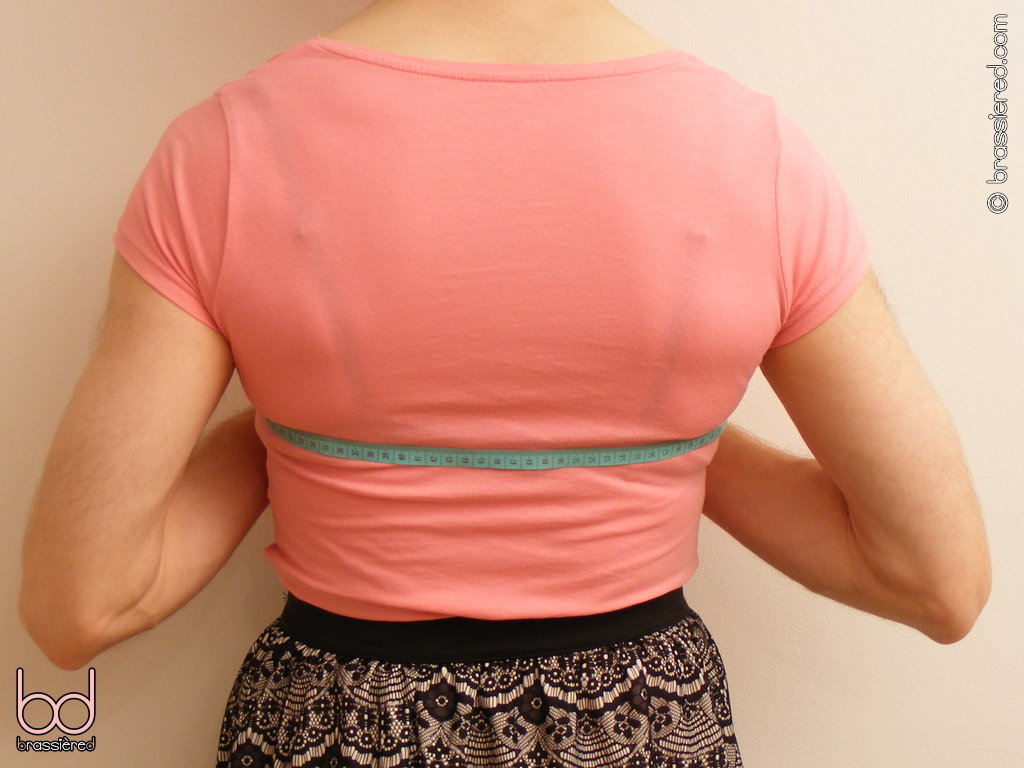
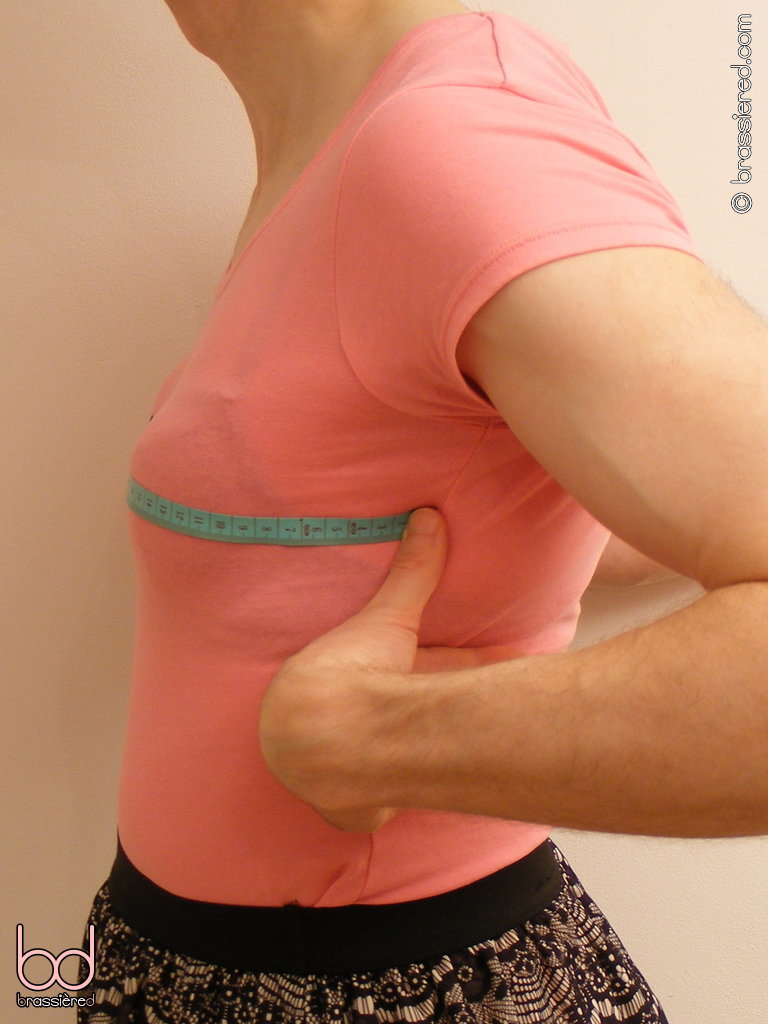
In Figure 2.5, my husband takes advantage of the seams of his stretchy top to help split his body in half, but he could simply come down from his armpit to determine where to start. Once again, the tape measure should be stretched across the most protruding part of the chest, remaining parallel to the ground until it reaches the other side. This is the front bust measurement, which is likely to be larger than the back bust measurement you'll discover by repeating the process for the rear half of your body. Together, the two should sum to the full bust circumference you found earlier, taking all three measurements providing a useful check of your accuracy.
Waist circumference
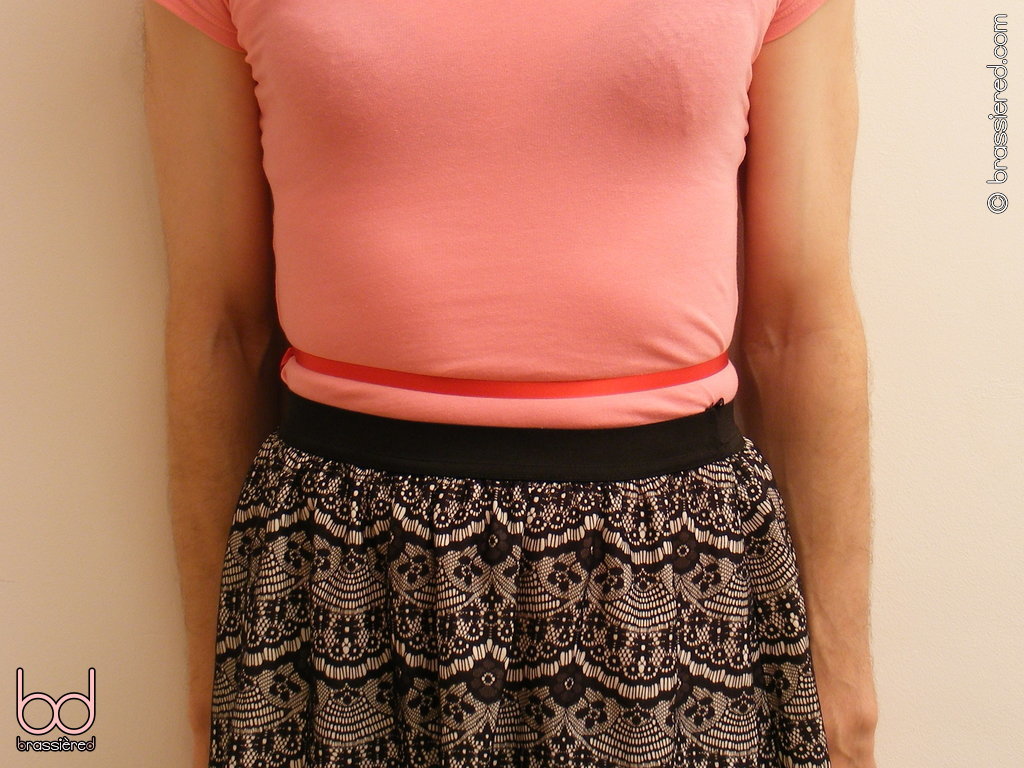
Looking at my husband in Figure 2.6, it would be easy to assume that the elasticated top of his skirt sits around his waist, but thanks to the weight of fabric pulling the former down, his true waist is actually somewhat higher. Lying somewhere between the bottom of the ribcage and the top of the hipbones, the natural waist is the narrowest part of the torso, something that would be apparent on an individual with more of an hourglass figure. It's marked in the photograph by means of a ribbon, but this isn't simply for show - as well as helping to determine the correct position, the resulting belt will also serve as a guide for subsequent measurements.
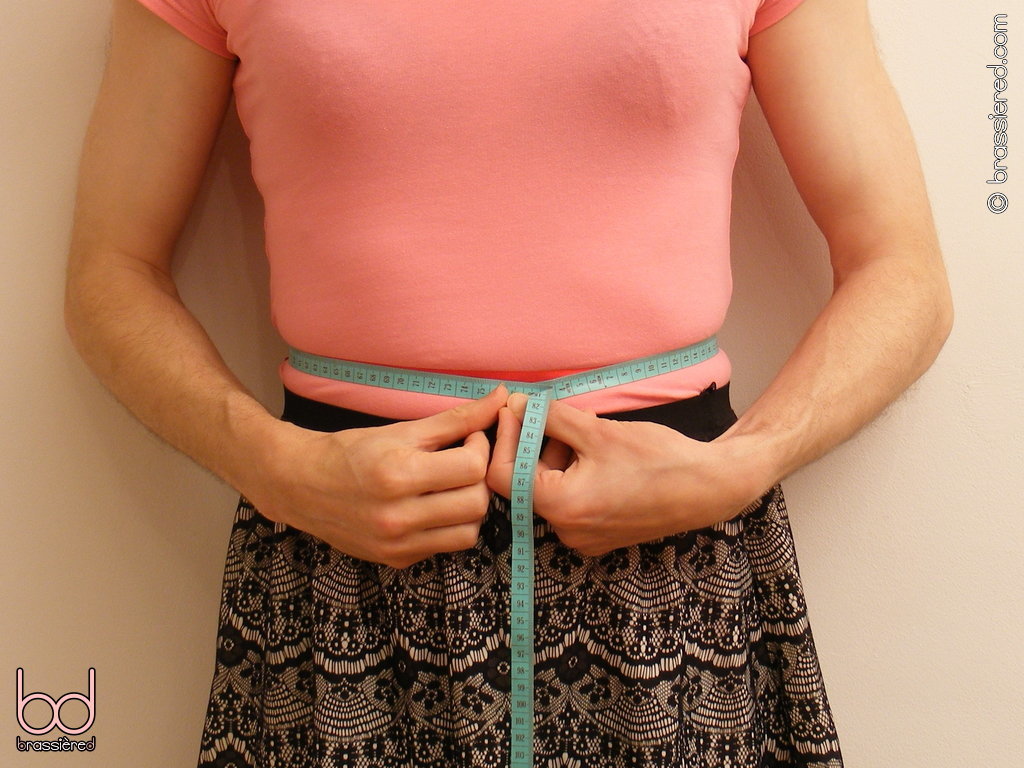
After tying a lasso around your torso and pulling it tight, bend your body from side to side a few times and note where the ribbon subsequently sits. You can then wrap the tape measure around it to take your waist circumference. Unless you intend to do the chores in a corset, keep your stomach reasonably relaxed as you do this rather than excessively sucked in, so as to give yourself space to breathe in your uniform. If your body bulges outwards, measuring around the belly button will work as an rough approximation.
Neck circumference
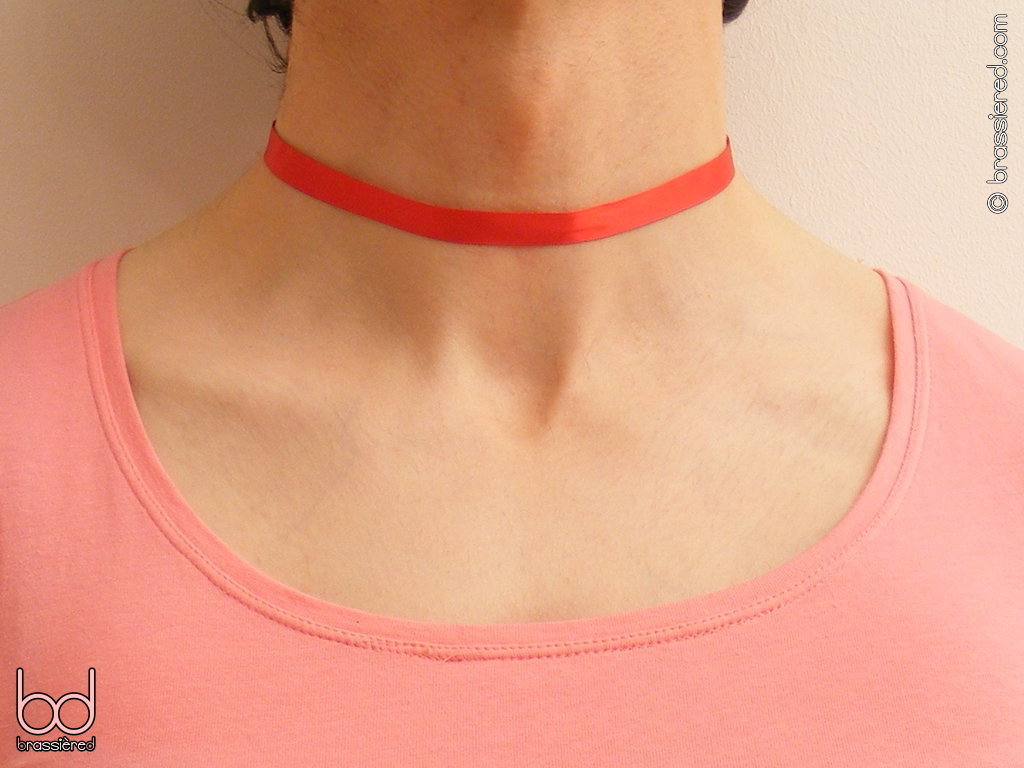
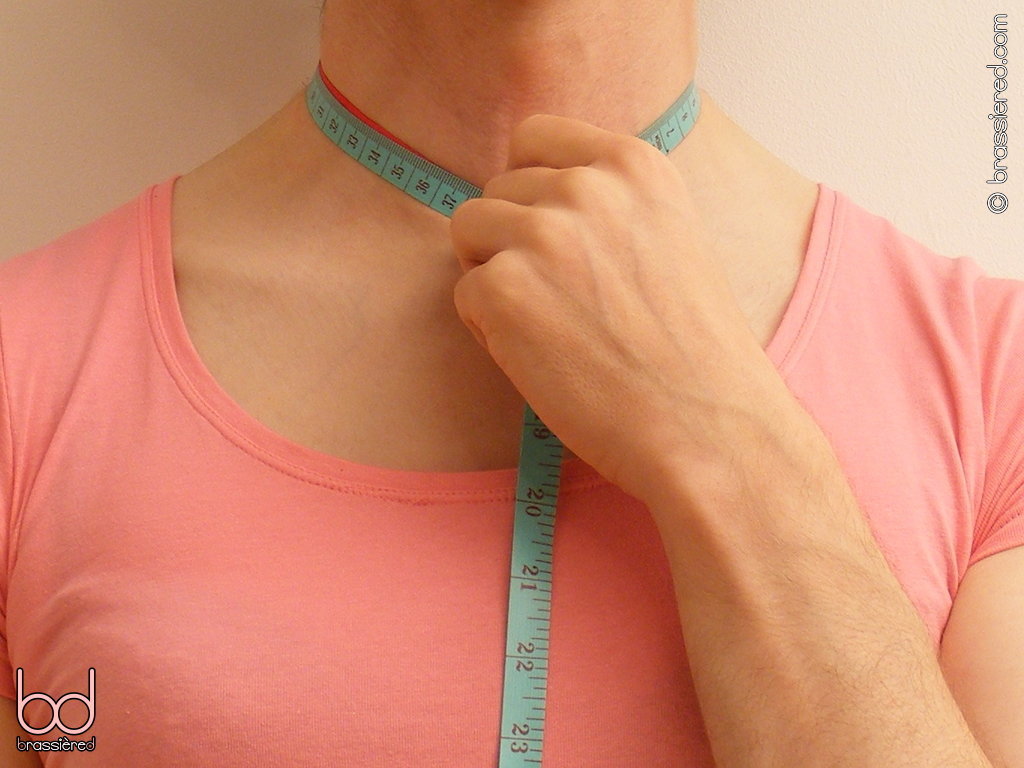
Reaching a hand behind your neck, you'll feel a prominent bone at its base - this is the topmost vertebra of the cervical spine. Take a second length of ribbon or string and drape it over this protrusion, tying it around the neck so that it sits just beneath your larynx. Don't wrap the string around the latter, but allow it to follow the natural contour of the neck, looking straight ahead and keeping your shoulders relaxed as you do so. The end result will be a cute little collar of the kind that my husband models in Figure 2.7, which may be followed with the tape measure to yield your neck circumference.
There's something deliciously submissive about having even a slender ribbon tied around your neck, let alone the more substantial, lockable choker we'll be using this measurement to make. For the moment, leave your new collar right where it is - it'll serve as a useful guide for the next two measurements.
Nape to waist
Standing normally, measure down from the bone at the back of your neck, following your spine to your natural waistline. If you're still wearing your ribbons, this should simply be a case of measuring between collar and belt, albeit taking care not to distort your body as you reach behind your back - something my husband demonstrates in Figure 2.8, keeping his arms in the same plane as his body. The resulting distance is your nape to waist measurement.
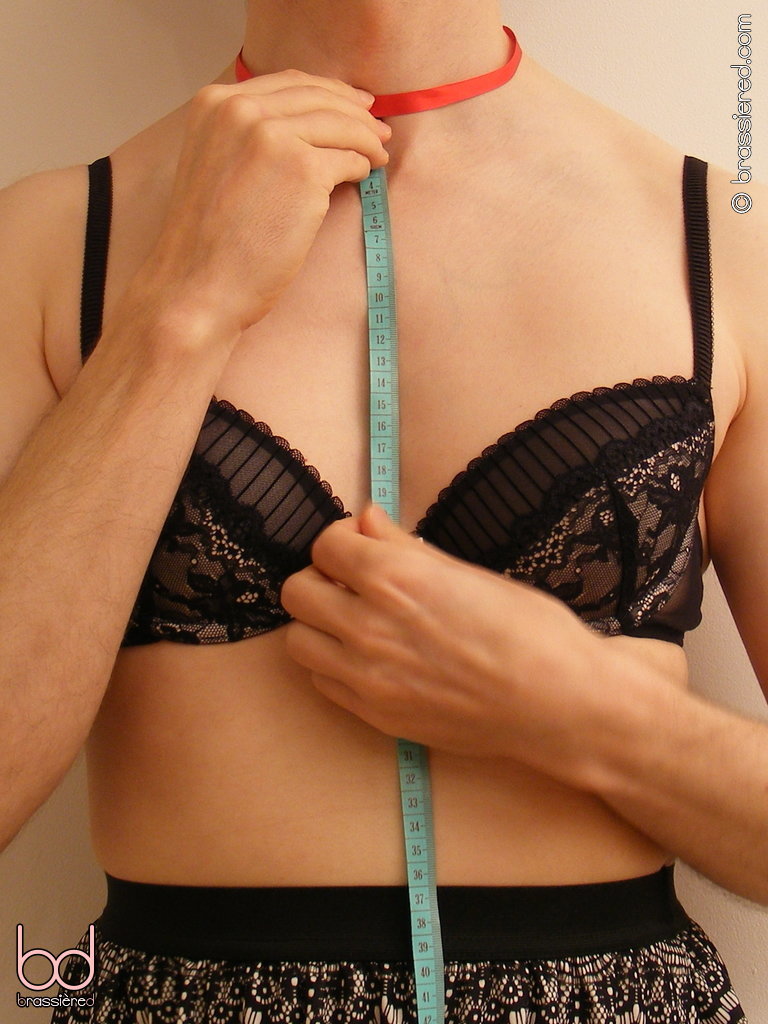
Neck to bust
On the other side of your body, measure down from the hollow of your neck to your bustline. If, like my husband is in Figure 2.9, you're suitably collared and brassièred, this should merely require you to stretch your tape measure from the ribbon around your neck to where your bra cups meet in the middle - a point adorned on all but the plainest of undergarments by a bow. This yields your neck to bust measurement, which we'll use later to determine how modest (or otherwise!) the neckline of your maid's dress will be.
Front shoulder to waist
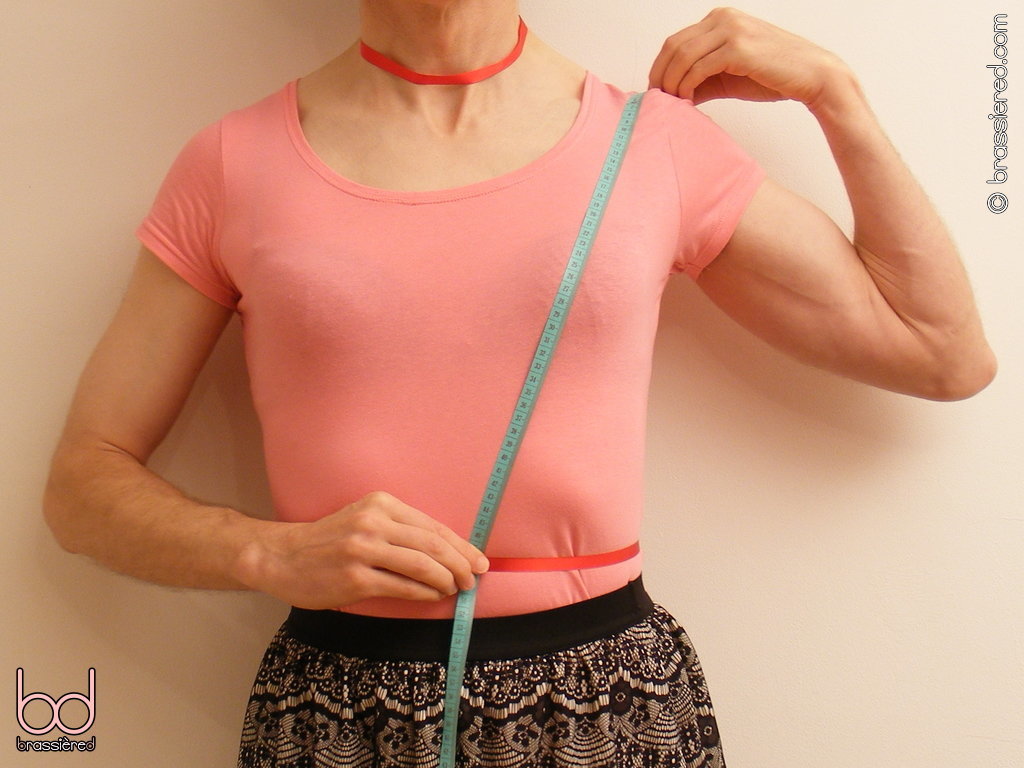
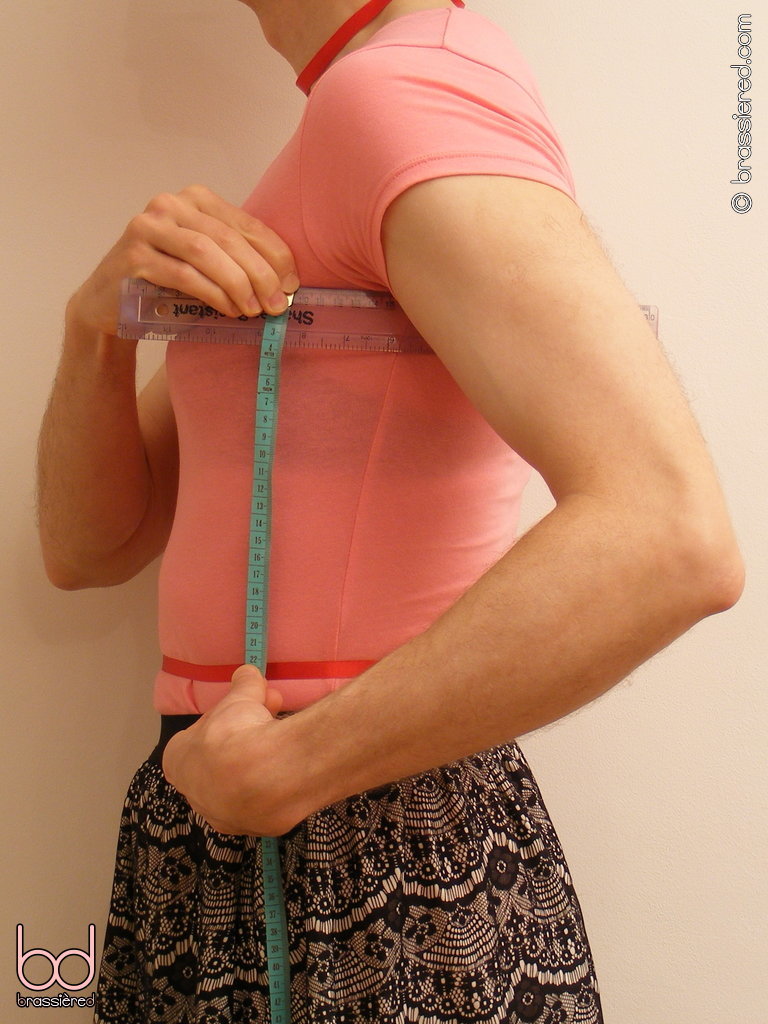
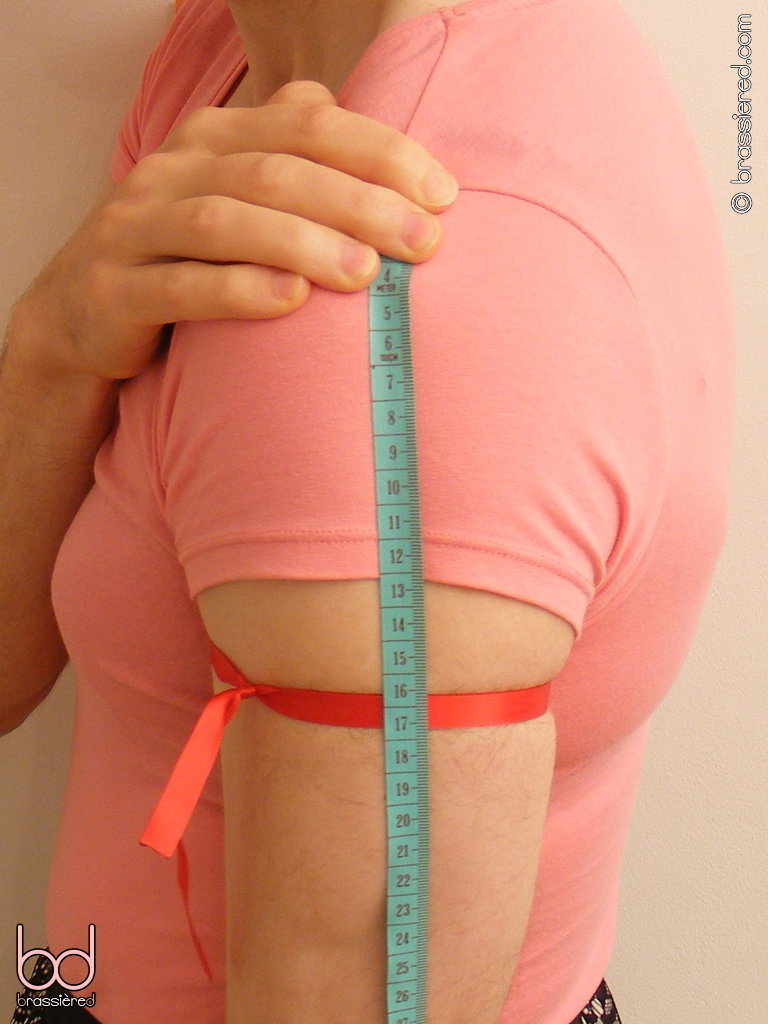
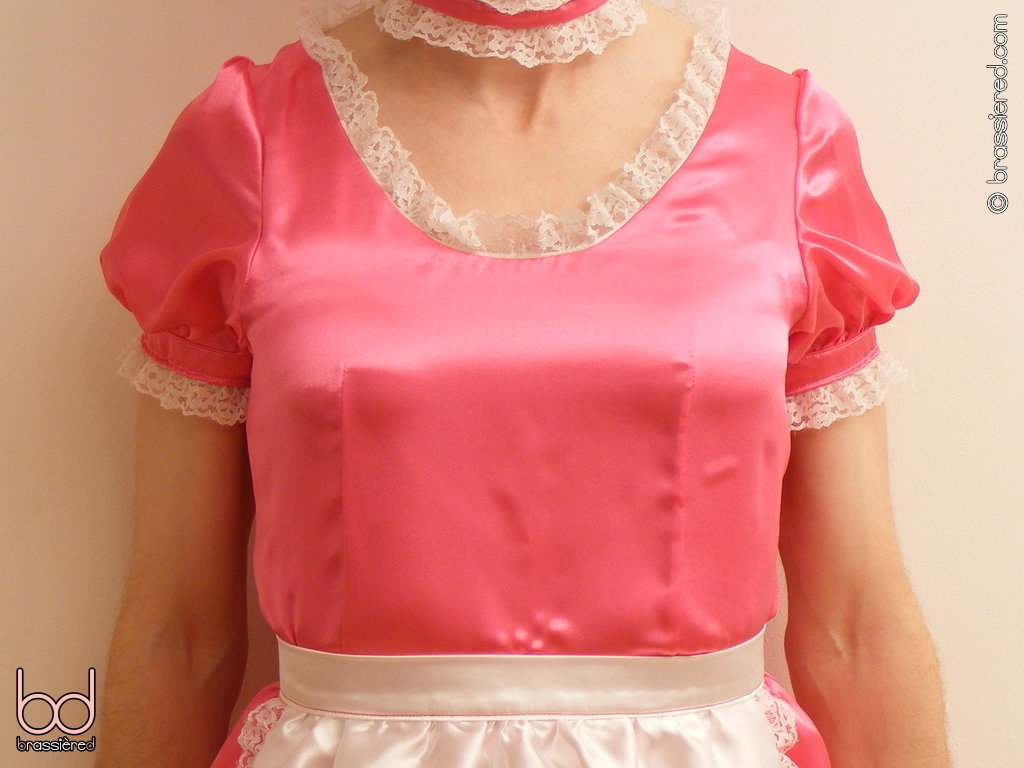
Returning to the tip of your shoulder, measure diagonally down across your chest to the centre of your waist, crossing the fullest past of your bust in the process - this is your front shoulder to waist measurement. Still wearing his pretty pink top, my husband demonstrates doing this in Figure 2.10, measuring between its convergence of seams to where his belt of red ribbon sits close to his belly button. Were he busty enough to wear more than an A-cup bra, the tape measure would form a distinct V-shape as it stretched over his breasts - make sure you keep yours tight as you measure yourself, even if the bulge of your bust sees a gap between the tape and the lower half of your torso.
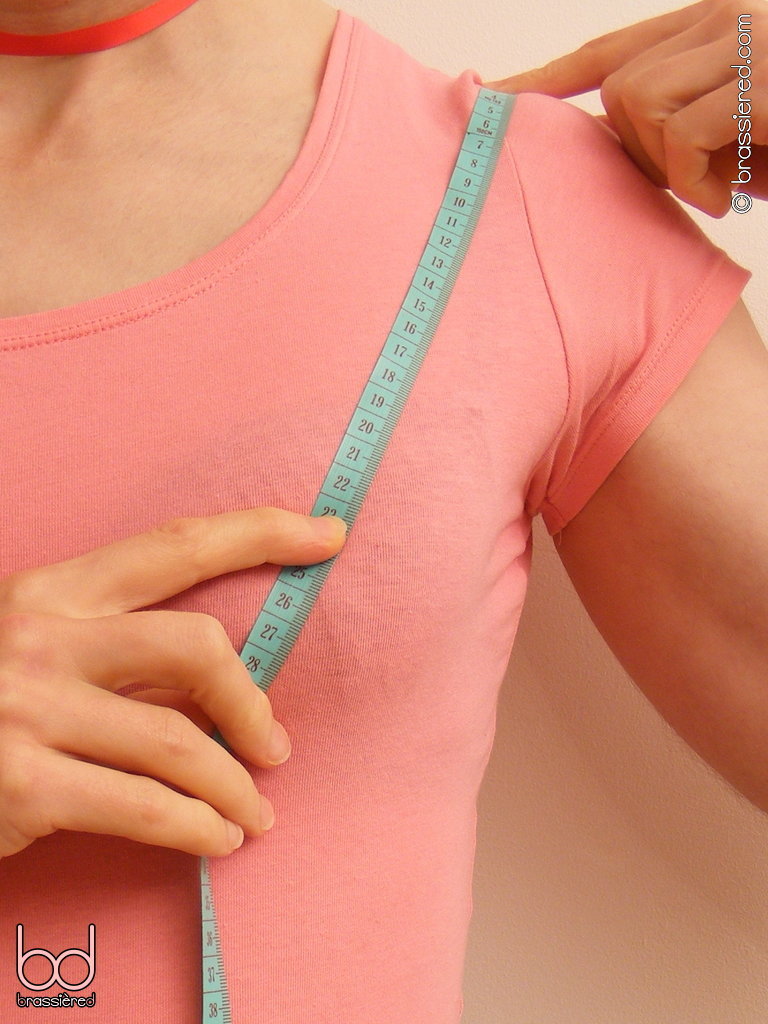
Shoulder to bust
We need to do more than merely accommodate your womanly curves when measuring, however, having to determine their position if we're to draft a dress that fits your particular figure. Repeating the previous procedure, this time make a note of where the tape measure crosses the fullest part of your bust. The latter is known as the bust apex, but is not necessarily the same as your nipple - instead, it's the point that would first touch a wall were you to shuffle slowly towards it. Depending on the design of your bra, there may be the point of a dart here - a fold or seam in its fabric to allow for the curve of its cup. Make a note of the distance to this point as your shoulder to bust measurement.
Back shoulder to waist
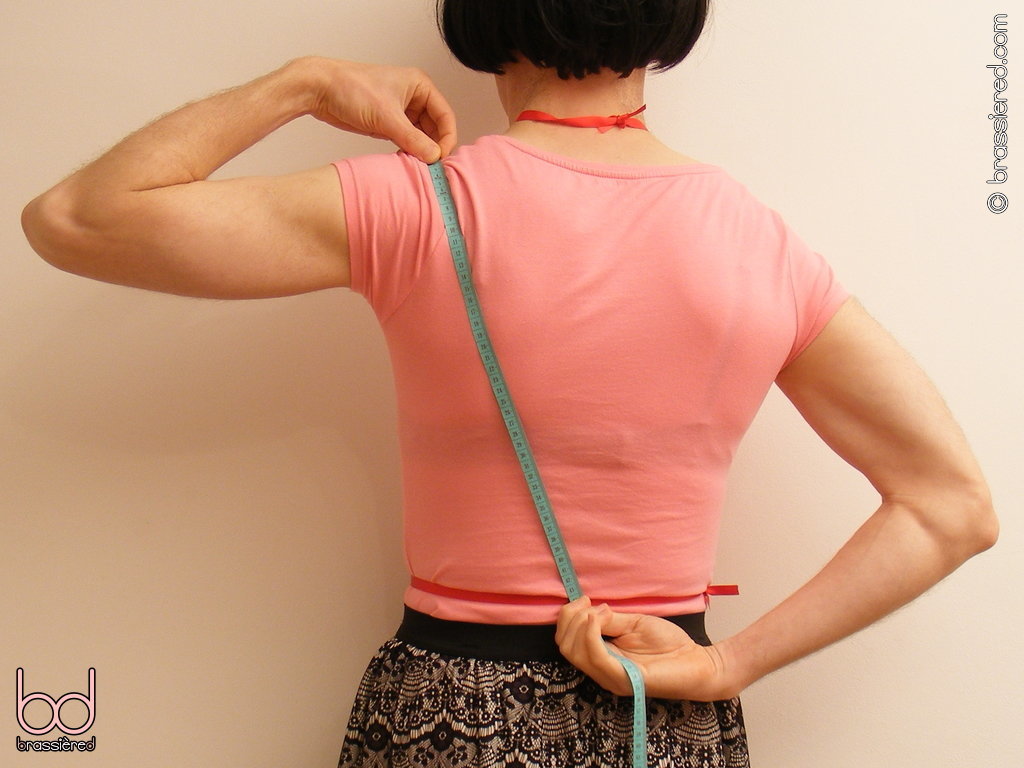
You've already measured from the shoulder to the waist over the front of your body. Now you'll need to do so again, this time across your back to yield your back shoulder to waist measurement. Again, you should stand up straight, keeping the tape measure tight as you stretch it across your shoulder blade. Take care not to let your shoulder slump forward in the process - for best accuracy, it helps to adopt an exaggerated “teapot” pose, with your elbows pressed out to the sides as my husband demonstrates in Figure 2.12.
Armpit to waist
With your arm resting against your side, slide a ruler up under your armpit. Keeping it parallel to the floor, hold your tape measure against its top edge so that it hangs down towards the ribbon around your waist, as illustrated in Figure 2.13. The distance from the top of the ruler to the ribbon is your armpit to waist measurement.
Waist to mid-thigh
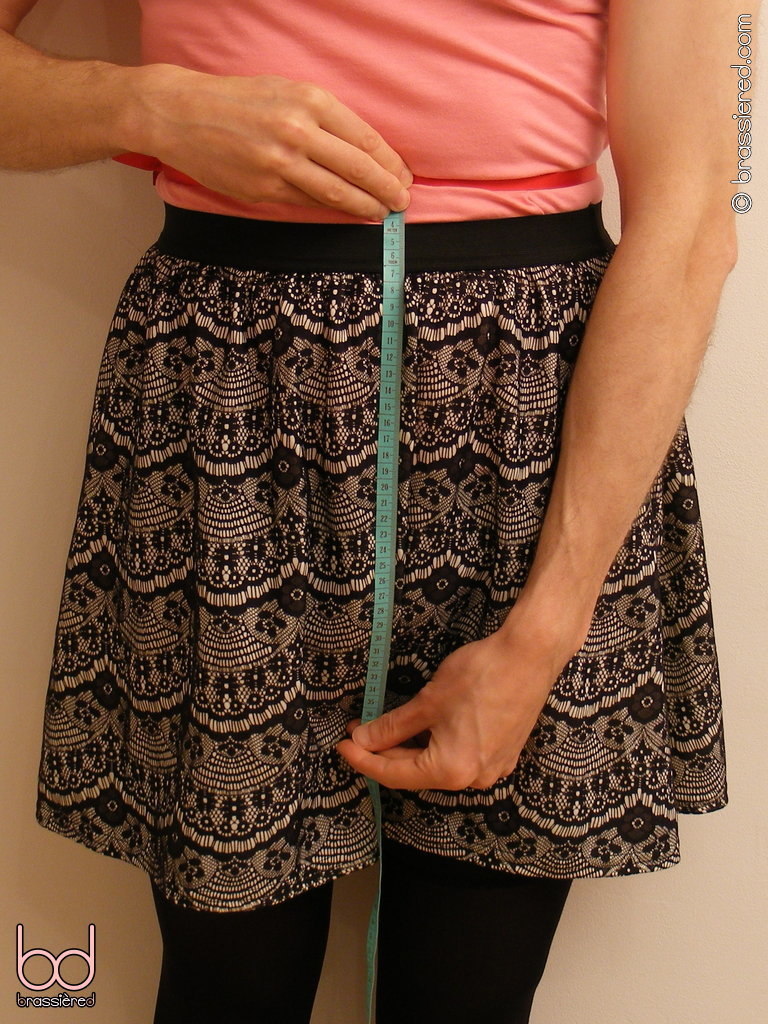
An appropriate length for a maid's skirt is a matter for his mistress, but regardless of whether your hem will be brushing your heels or your panties it helps to have some idea about measurements. Like those he'll be wearing as he works, my husband will be making a maid's dress with a skirt that will safely cover his stocking tops, yet one that's still capable of being flared out by his frilly petticoats (for longer or shorter skirts, see Chapter 12). A suitable measurement for him to take, therefore, is from the ribbon around his waist to the midpoint of his thigh, the latter being a little above the bottom of his skirt in Figure 2.14. You can similarly use an existing garment as a guide, or simply take your waist to mid-thigh measurement straight from your body.
Bicep circumference
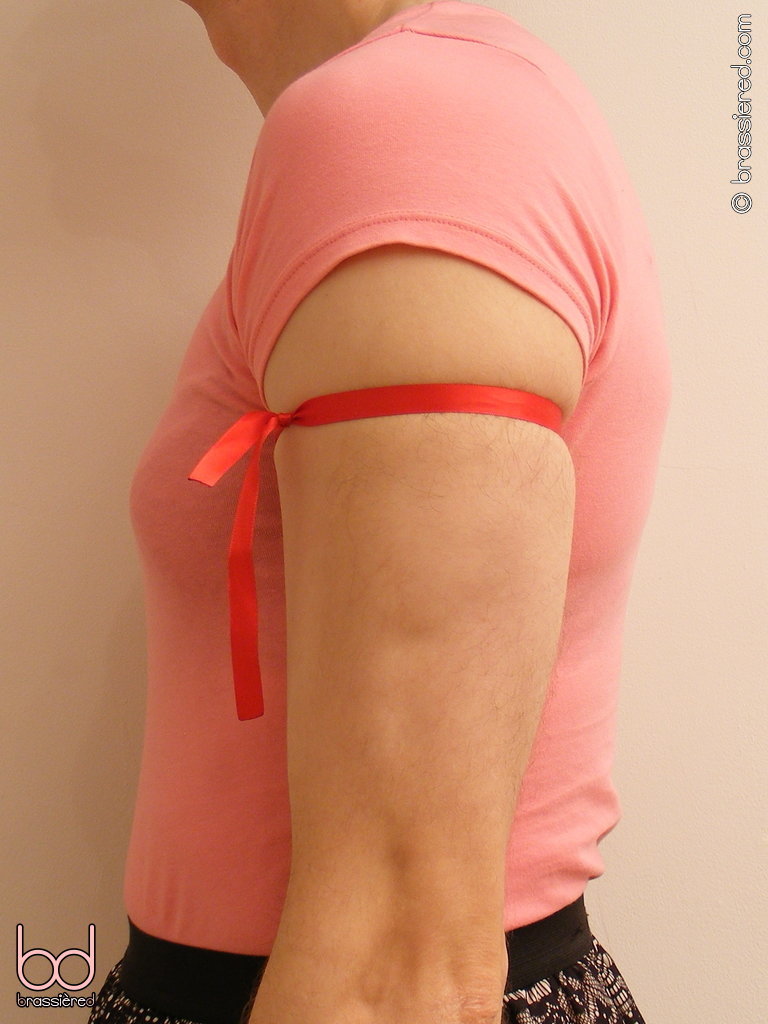
Although my husband's stretchy top has served him well so far, its sleeves are a little too short for my liking, hardly having enough length to allow for the puffy princess style so suitable for a sissy maid. In Figure 2.15, therefore, he has simulated a more generous sleeve by means of another length of ribbon, this time tied around his arm in the approximate position of where I want to see lace. It may surprise you to learn that we won't be measuring directly around here, but if you imagine slipping your hand into a sleeve, you'll soon realise that that such an opening needs to accommodate everything up from the wrist - no matter how high it finally comes to rest.
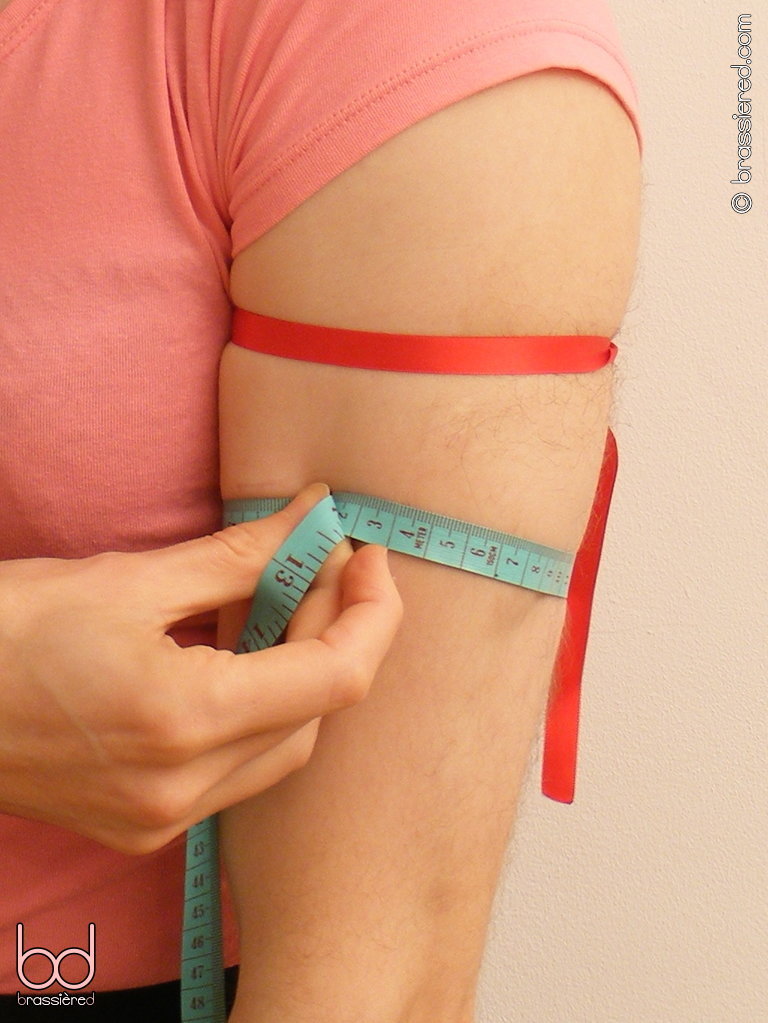
Instead, you'll want to measure around the fullest part of the arm, something you'll find by flexing your bicep. It may seem strange for a submissive maid to adopt such a macho pose, but making your muscles bulge will show you exactly where your arm is widest. Mentally note where this is, then allow your arm to hang relaxed by your side as you wrap the tape measure around it to discover your bicep circumference.
Overarm length
Keeping the arm hanging naturally, bring the tape measure back to the tip of the shoulder, measuring down the side of the arm to the ribbon as my husband demonstrates in Figure 2.16. This is your overarm length.
Underarm length
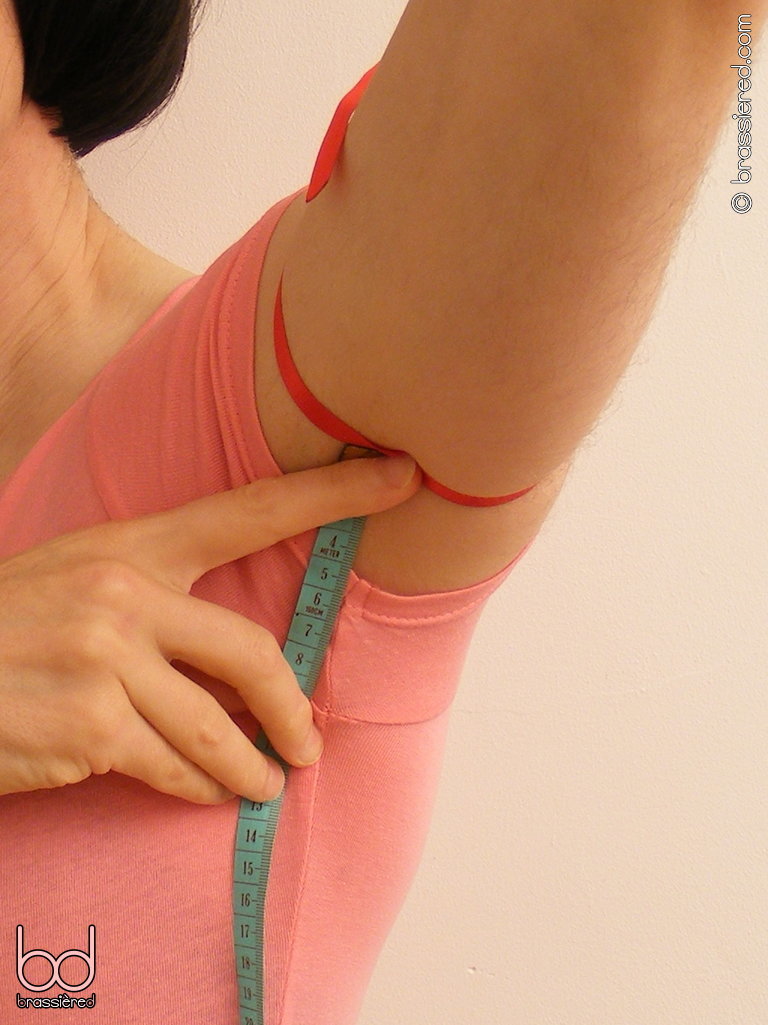
Considering where you pressed the ruler previously, measure from a point in the middle of the armpit, stretching the tape measure along the underside of the arm to where the ribbon marks your desired sleeve. In Figure 2.17, my husband once again takes advantage of his stretchy top to make things simpler, its side seam crossing that of its sleeve in roughly the right position. Make a note of this distance as your underarm length.
Measurements to calculate
So far, none of the measurements you've taken have needed you to understand how they'll be used, although you've probably been able to see the purpose of many of them. When drafting a pattern for a maid's dress, however, there are a couple more variables that are under your control, with the decisions you make determining important details about the garment's fit. Moreover, the necessary numbers can't simply be taken with a tape measure, and while you can make use of magic formulae without knowing what any of the numbers mean, it's helpful to understand a little more about dressmaking so as to be able to make a more informed choice - not to mention amuse your mistress with your knowledge of such feminine matters.
Dart widths and drop
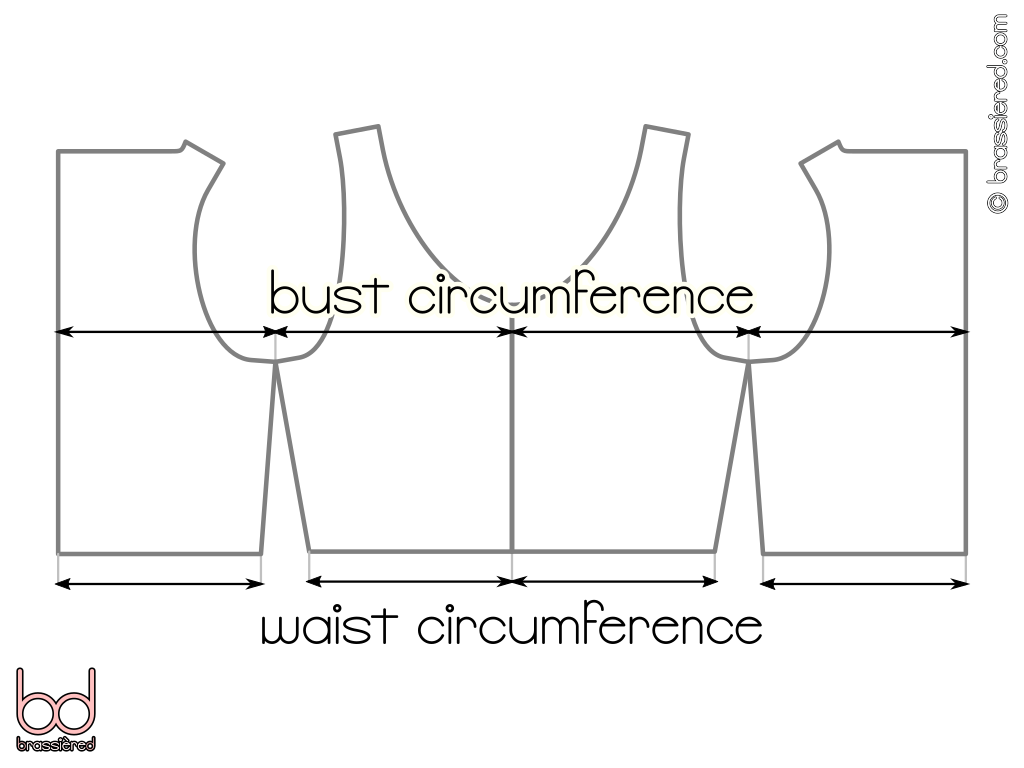
If you look at your measurements, it's unlikely that your bust circumference is the same as your waist circumference - no matter how flat-chested you may be, your body is not a cylinder, and so your bust is likely to be larger1. Remembering that we're having to cut from a flat sheet of fabric, if you were to naively put together a pattern with the aim of fitting your figure, you would expect its pieces to slope to accommodate this difference - as Figure 2.18a illustrates. If you imagine sewing the various edges together, you can see how the resulting bodice would taper with the torso, being wider at the top than it is at the bottom.
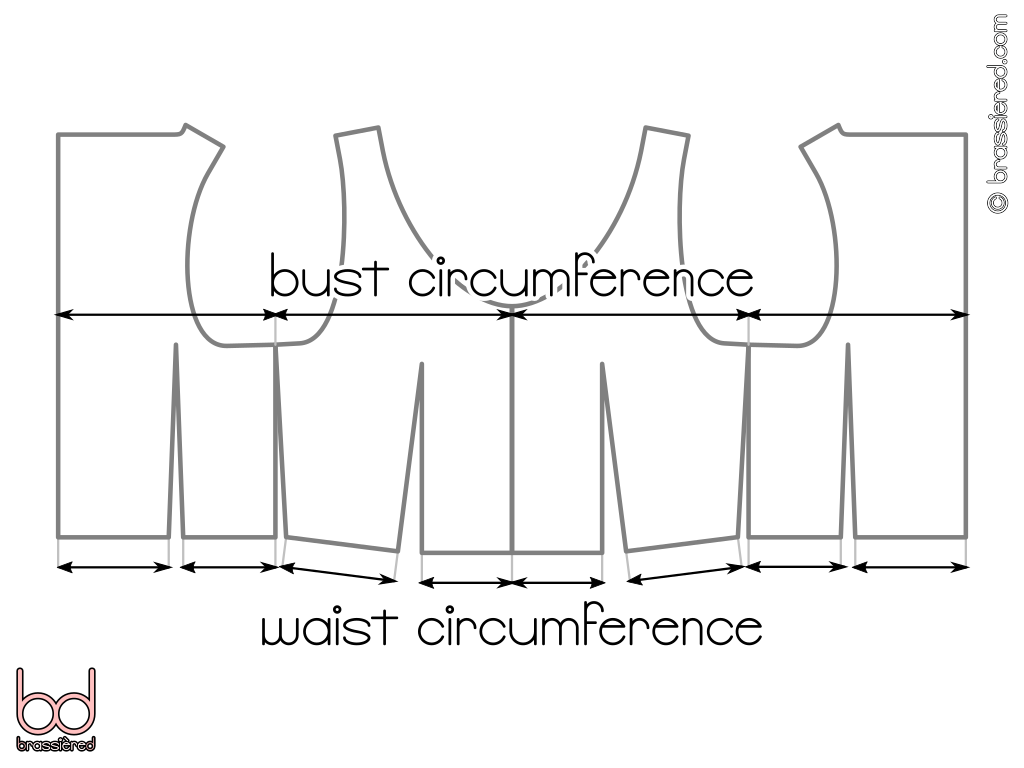
There's nothing wrong with this approach, but we can do better by using darts - triangular folds in the fabric that help it follow the shape of the body even more closely. Figure 2.18b shows how these can be used to split the difference between bust and waist across several smaller gaps, rather than pushing it all to the seams at the side. Again, by sewing all the edges together, we create a bodice that tapers, but this time, one that better accommodates the breasts and the shoulder blades. Moreover, the way that the darts point to these parts of the body makes for a pleasing effect, attracting attention to the bust in a manner most emasculating for a male maid. The seams that run down my feminized husband's chest in Figure 2.19 seem to call the eye to the slight bulge of his bra, provocatively coming to a point near the apex of his breasts.
So how big should these darts be? Beyond the sum of the gaps having to be the same as the difference between bust and waist, there are no hard and fast rules, but it's better to spread things out evenly. You might begin by comparing your front bust measurement to half of your waist circumference, splitting the difference into thirds - one third for each of the front darts, and the remaining third to be split between the two side seams. By doing the same at the back, you'll have a good starting point for your front dart width and back dart width, although if you're a man with only modest curves, you may need to shuffle the numbers around slightly to keep the darts a reasonable size - perhaps even forgoing the back ones entirely in order to enlarge those at the front. A dart that is less than 1cm / ½” is probably too small to be worth the trouble, not to mention difficult to sew.
In the next chapter, my husband will be using his measurements to draft a pattern for his maid's dress, using front darts that are 2.5cm / 1” wide, and back darts that are slightly smaller at 2cm / ¾” - enough, when combined with a slight side gap, to make up the 10cm / 4” difference between his bust and waist.
There's unfortunately an additional wrinkle for the bust darts, with their points needing to stop a little short of the apex of the breast in order to achieve the desired effect. Once again, there are no precise formulae, but the larger your breasts, the bigger this distance should be. If, like my husband, you don't have much in the way of a bust, then use 2.5cm / 1” for your front dart drop. If you are blessed with rather more filling your bra, such as my husband might were I to want him to wear large false breasts, then you can happily double this.
Ease
Although your maid's dress should follow your figure, you don't want it clinging too closely - without any stretch in its fabric, the slightest of movements will put undue pressure on its seams, quite apart from the awkwardness of wearing such a constricting garment. In addition to the measurements you've taken, therefore, we'll need to add a little extra in particular places to allow you to bend, reach and stretch as you go about your domestic duties. This is known as ease, for which 1cm / ½” is appropriate.
Seam allowance
It's impossible to sew a piece of fabric along its very edge - the stitches would simply fall out of the weave of the material. When drafting our design, therefore, we need to allow for a seam, doing so consistently across all the pieces so that they're the right size when sewn together. Again, this is a matter of personal preference, but it's worth taking a look at the plate of your sewing machine, which should be marked with a series of parallel lines like those in Figure 2.20. Ideally, you would choose a seam allowance that lets you make use of one of these, ideally around 1cm / ½”. If necessary, you can mix imperial and metric here. In the absence of a suitable line, a rubber band around the bed of the machine can be used as a substitute.